Template:PTZ Scan SmartPSS
Description
This article will cover how to setup the PTZ Scan function in SmartPSS
Prerequisites
- Dahua PTZ
- SmartPSS on a Mac or Windows PC, on the same network as the PTZ
Video Instructions
Step by Step Instructions
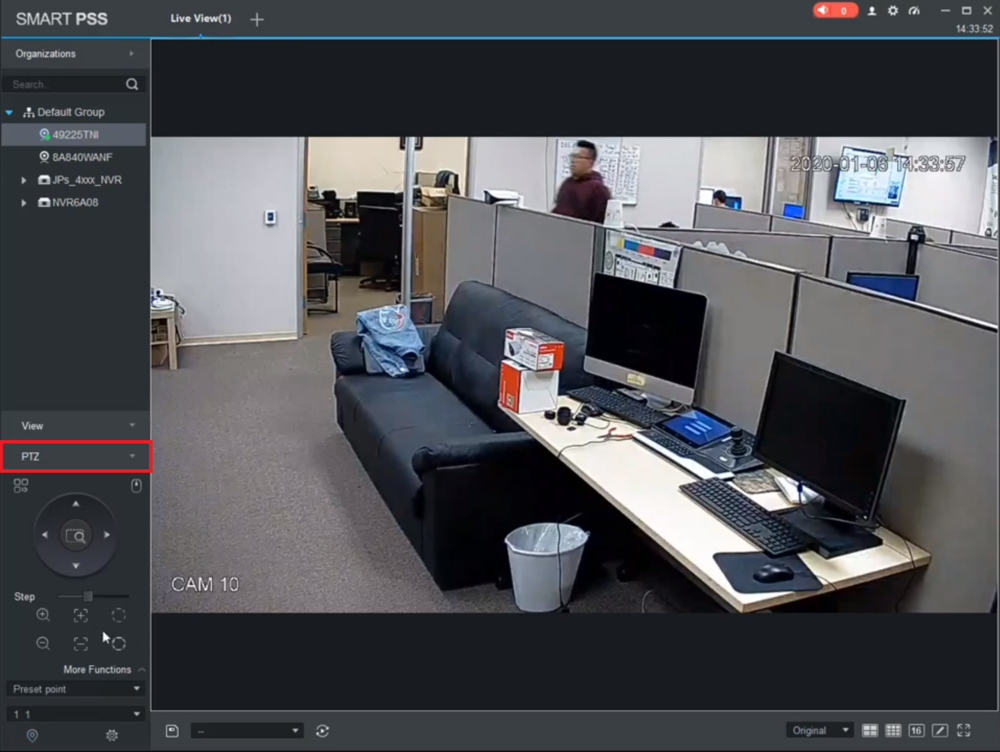
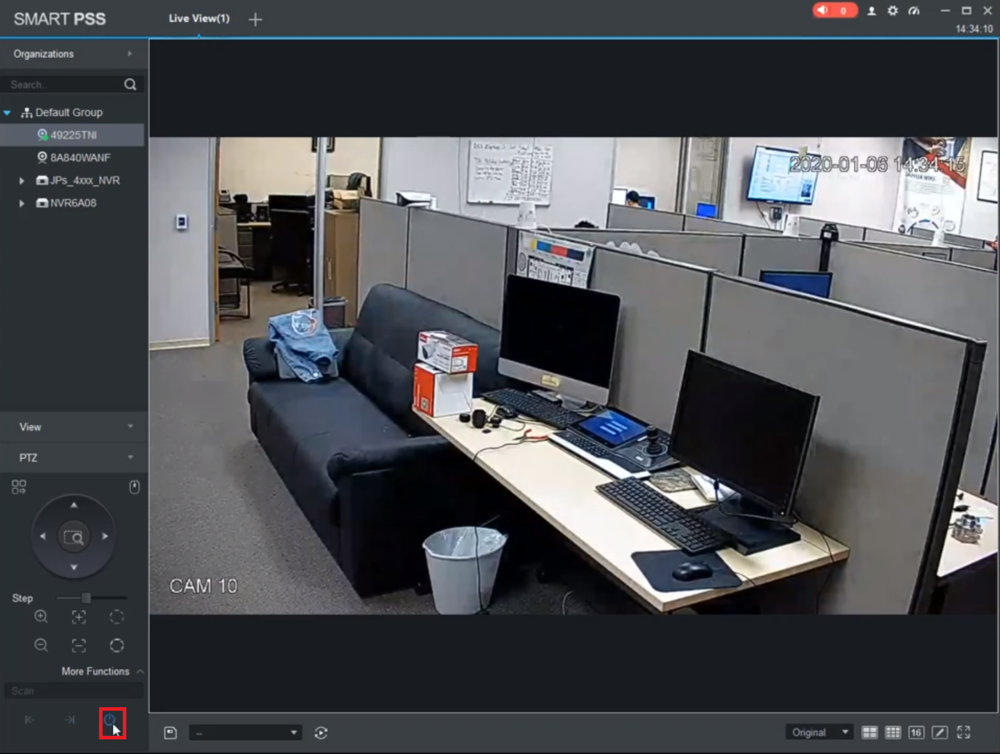
1. From the Live View of SmartPSS, open the PTZ camera's live view and click on its individual view. (A grey box should appear around the live view of that camera)
Select "PTZ" on the bottom left to expand the PTZ Menu
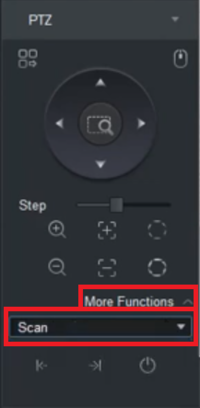
2. Select "More Functions" at the bottom of the PTZ section.
Click on the drop-down menu and select "Scan" from the list
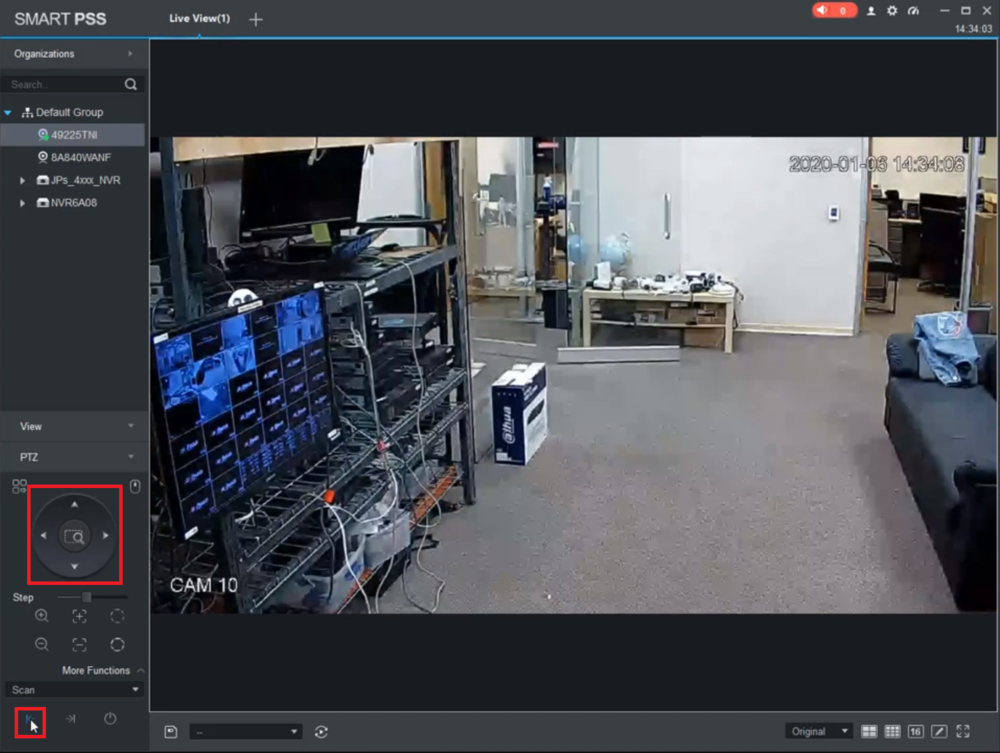
3. Use the arrow controls to move the PTZ camera to aim at where you want the left-most location of the scan to be.
Then select the Left button, which looks like a vertical line with an arrow pointing left to it, to set that postion as the left edge of the scan
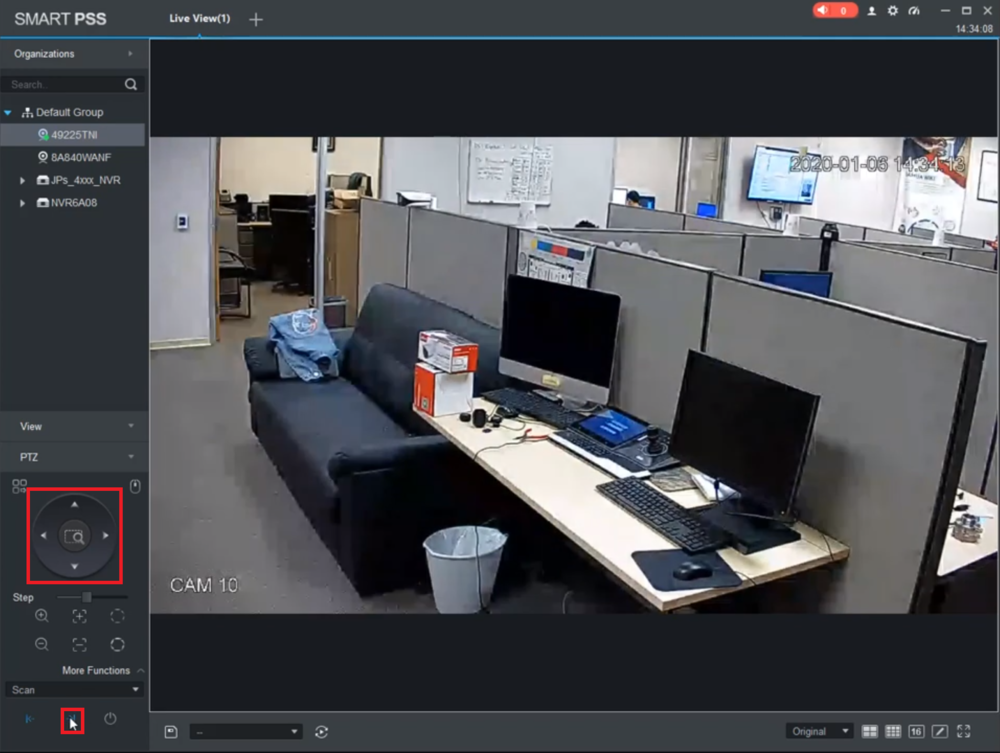
4. Then use the arrow controls to move the PTZ camera to aim at where you want the right-most location of the scan to be.
Then select the Right button, which looks like a vertical line with an arrow pointing right to it, to set that postion as the right edge of the scan
5. Select the Start Scan button, which looks like a power button, to initiate the scan function.
The camera should start scanning between the two postions you set above.
To end the scan, click on same button again that you selected to begin the scan
