Email Notifications
Email Notifications
Description
This section will show you how to setup email notifications using a 3rd party SMTP server.
Please note system will not send out the email immediately when the alarm occurs. When the alarm, motion detection or the abnormity event activates the email, system sends out the email according to the interval you specified here. This function is very useful when there are too many emails activated by the abnormity events, which may result in heavy load for the email server.
Common SMTP Settings
| Email Server | SMTP Server: | Port: | User Name: | Password: | Receiver: | Sender: | Attachment: | Encrypt Type: |
|---|---|---|---|---|---|---|---|---|
| Gmail | smtp.gmail.com | 465 | Your_Email@gmail.com | Your_Email_Password | (Email address to receive email notification) | Your_Email@gmail.com | Checked | SSL |
| Yahoo | smtp.mail.yahoo.com | 465 | Your_Email@yahoo.com | Your_Email_Password | (Email address to receive email notification) | Your_Email@yahoo.com | Checked | SSL |
Additional Gmail Settings
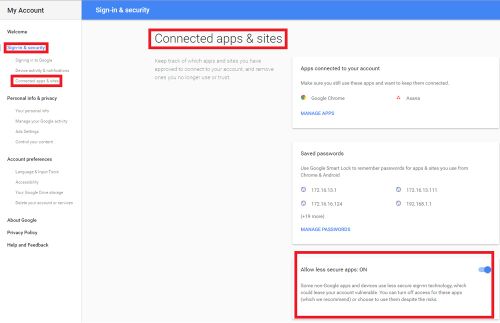
Please make sure your gmail settings on the temporary account are set to Allow less secure apps is set to ON:
1. Log into Gmail account and select the icon in the top right corner.
2. Select Connected apps & sites, then make sure "Allow Less secure apps: ON" is on.
Additional Exchange Settings
- If you are having issues sending emails through an Exchange email server, try entering the IP address of the Spam Filter rather than the IP of the Exchange server for SMTP Server information
Instructions
Description
Prerequisites
- a new throw-away sender email account that can be replaced
- a recipient email account
- an event set up to trigger the email alert
- NVR or HCVR with an internet connection
- You must have the device recorder connected to the internet in order for the DDNS account to be registered.
Video Instructions
Step by Step Instructions
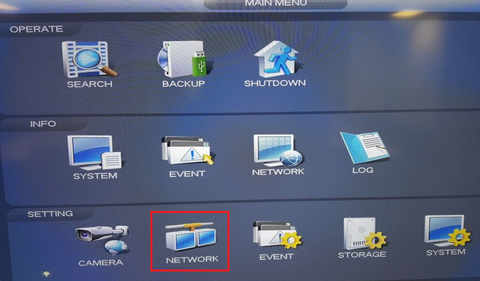
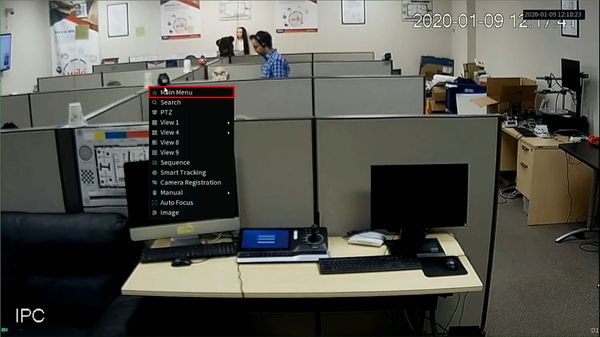
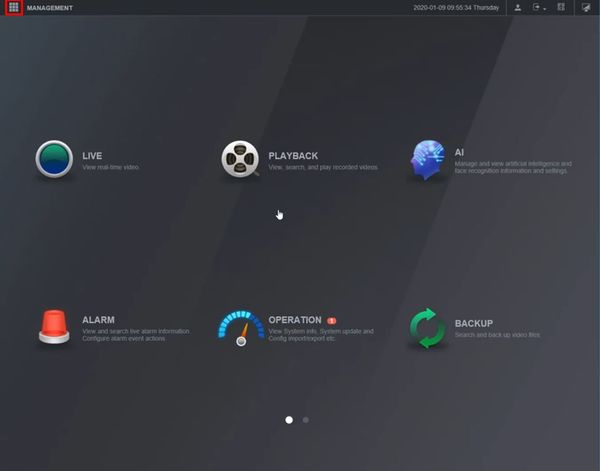
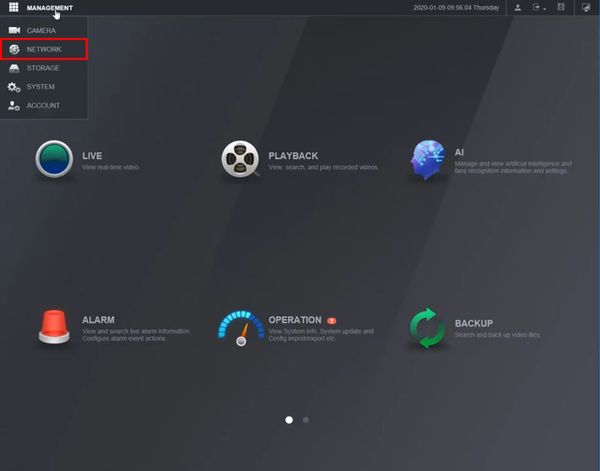
1. Right click from Live View to access the Main Menu
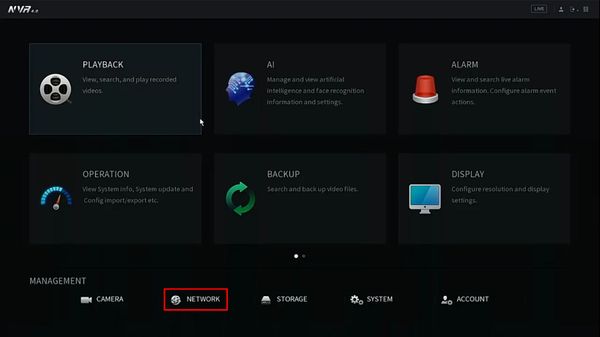
Click Network under Setting
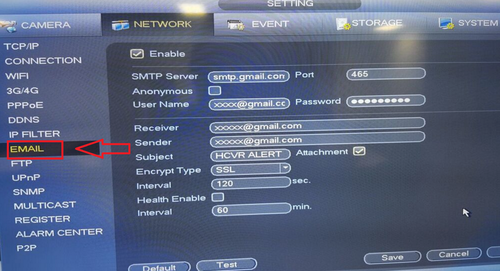
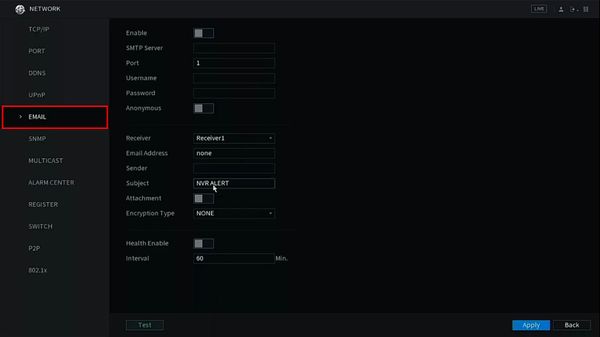
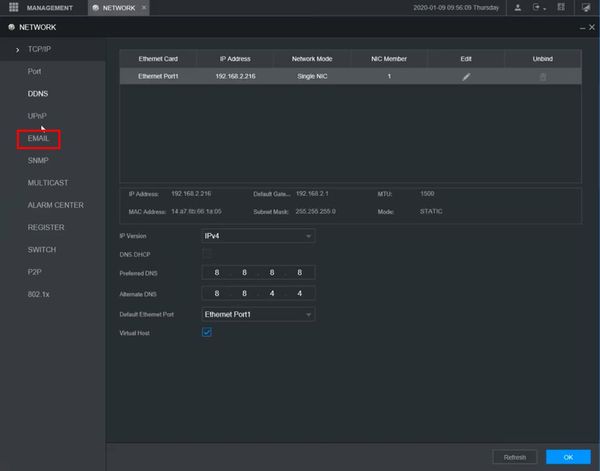
Click Email
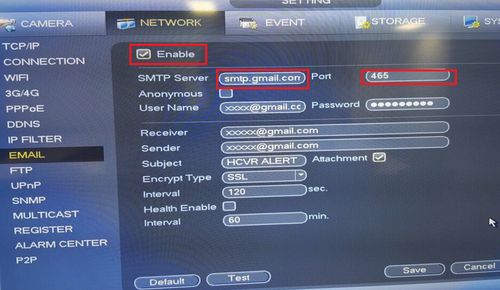
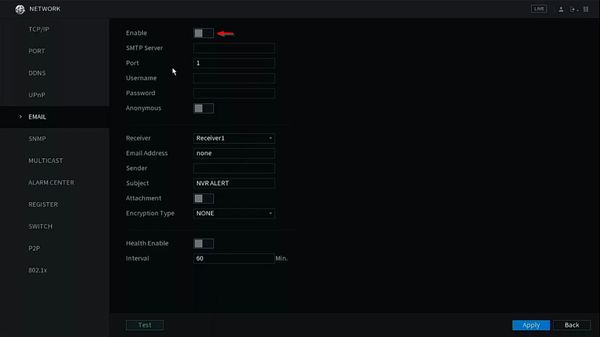
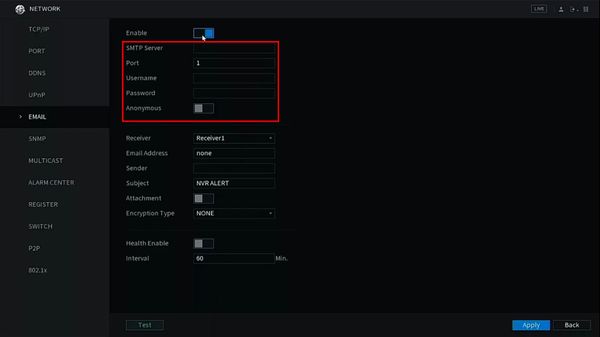
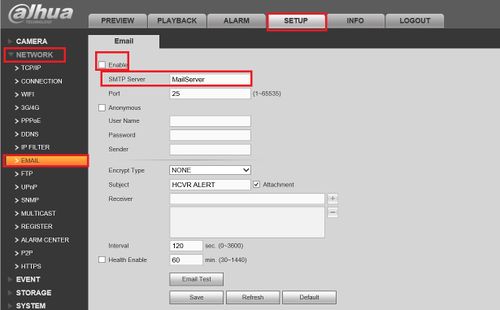
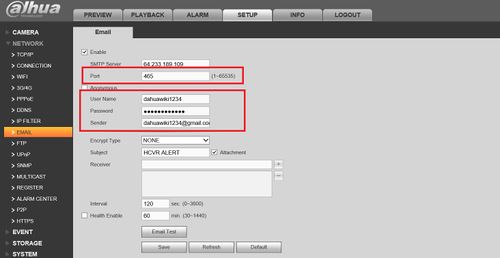
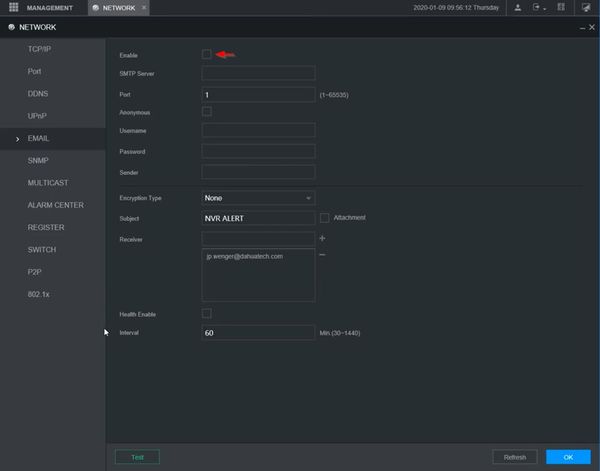
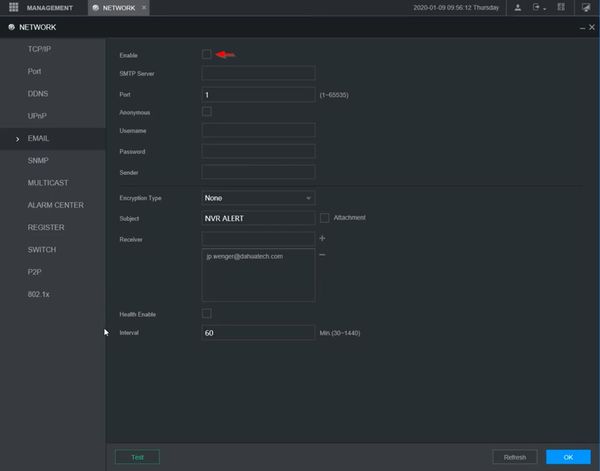
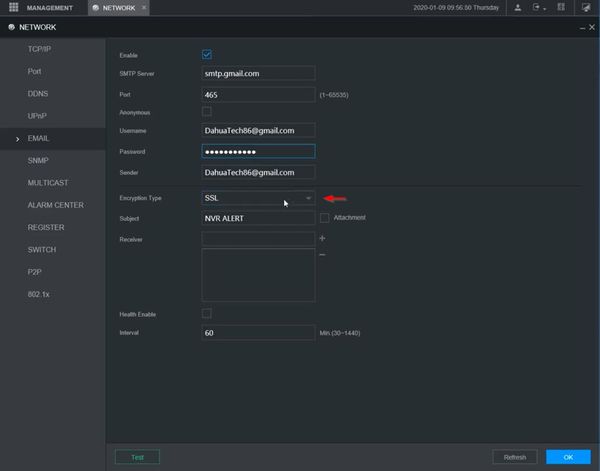
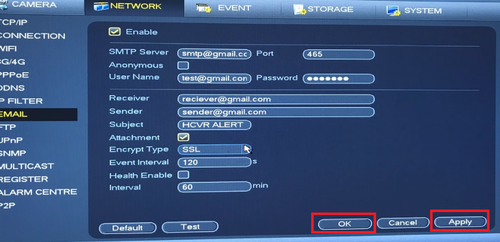
2. Check Enable → Input SMTP Server → and required port number. In this case Gmail (stmp.gmail.com) is being used; the required port number for SSL gmail encryption is 465. Please note depending on the email you are using the SMTP and port will be different. You may use this link to reference the SMTP for your email along with what ports can be used. If a company email is being used you will need to contact your IT department for the SMTP information.
https://www.arclab.com/en/kb/email/list-of-smtp-and-pop3-servers-mailserver-list.html
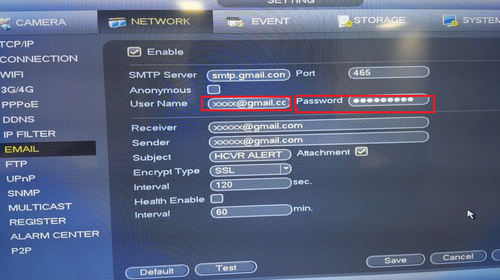
3. Input User, which is the email you are using. e.g. xxxx@xmail.com → input password of email you are using.
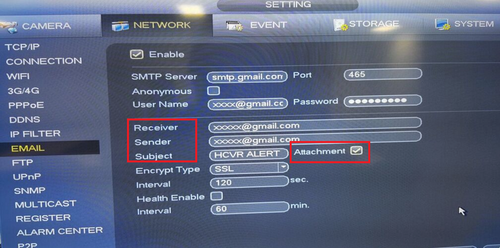
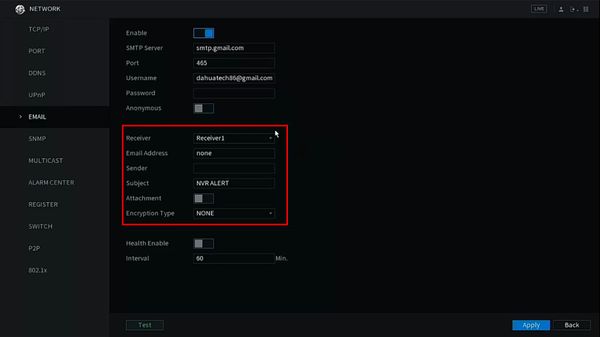
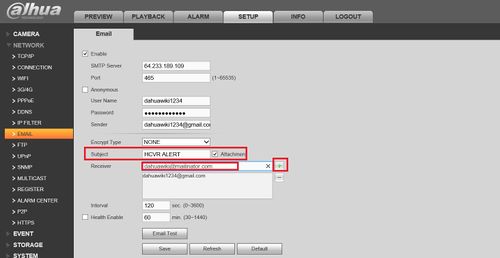
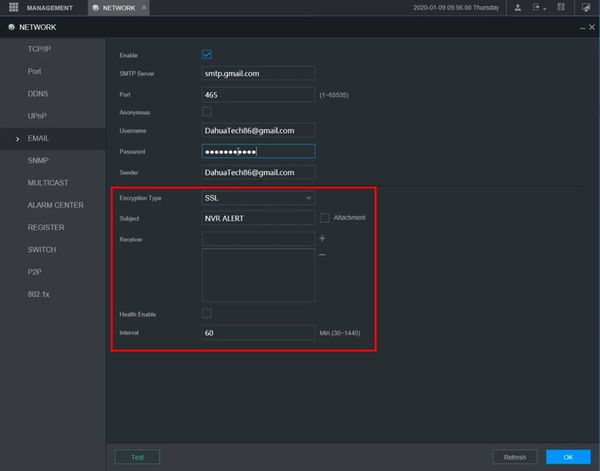
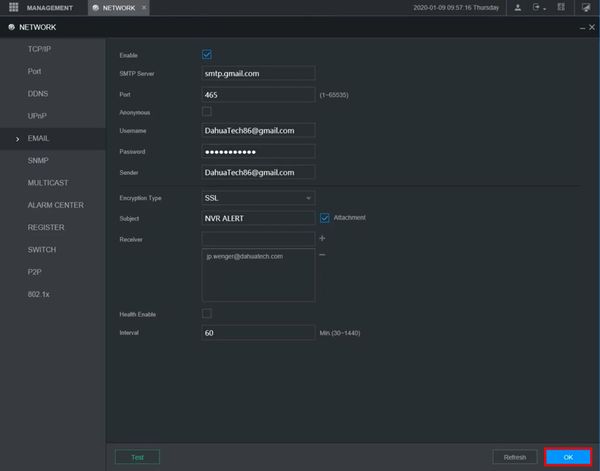
4. Input Reciever e.g. xxxx@xmail.com → Sender e.g. xxxx@xmail.com. Input a different email for receiver and sender (Must not be the same email) → Input Subject for the email header when you receive the email notification → Check "Attachment" for attachments such as motion detect snapshots.
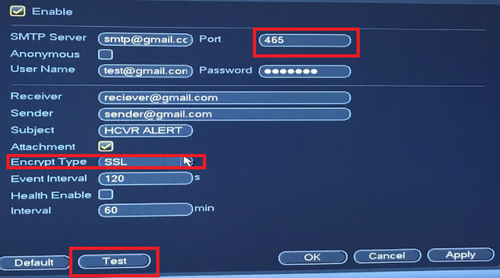
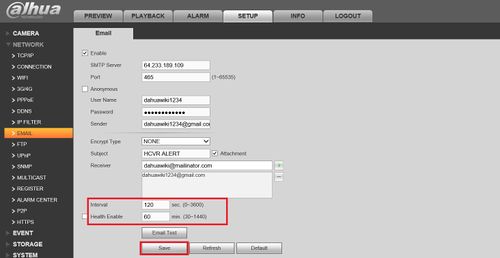
5. Input Encrypt type that corresponds to the port number that is provided in the link above → input interval → select test to verify it works. It will prompt if test has succeeded or failed. You should see a "Mail Test" notification in your email.
6. Before the next steps, ensure "Enable" is check marked. Click "Apply" → "Save" to save settings.
Email Notifications
Prerequisites
- A new throw-away sender email account that can be replaced
- A recipient email account
- An event set up to trigger the email alert
- NVR or HCVR with an internet connection
Video Instructions
Step by Step Instructions
1. From Live View
Right click select Main Menu
2. Click Network
3. Click Email
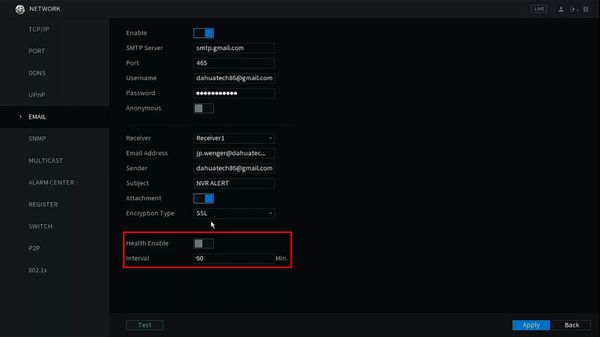
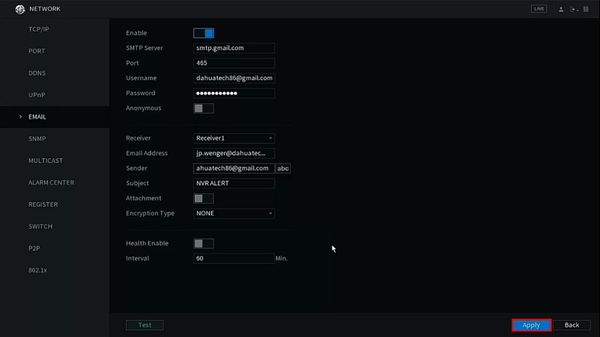
4. Click the toggle button to enable the Email feature
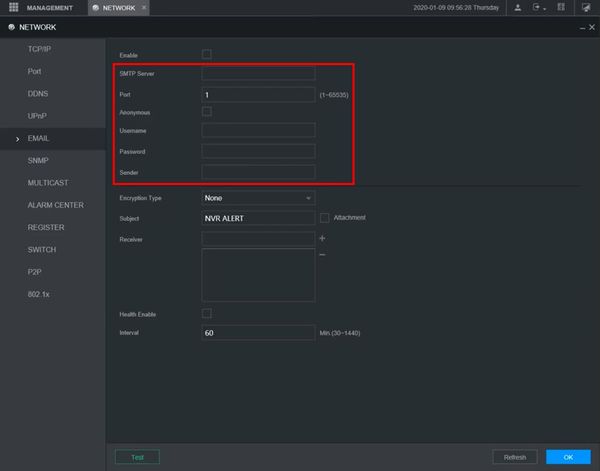
5. Enter all information for the SMTP Server being used:
- SMTP Server
- Port
- Username - full email address (including @___.com)
- Password - password for email account being used
- Anonymous - toggle to send the email as Anonymous (Email server must support this)
6. Enter information for the Email that will be sent out
- Receiver - select the Receiver #
- Email Address - enter the full email address that will receive the email
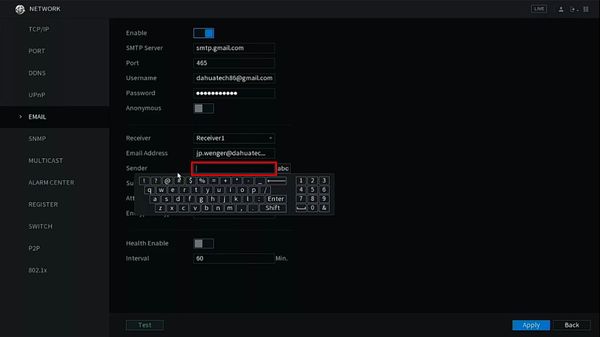
- Sender - enter the full email address that is sending email
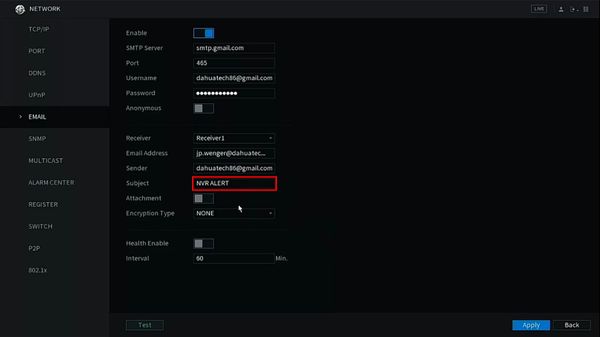
- Subject -
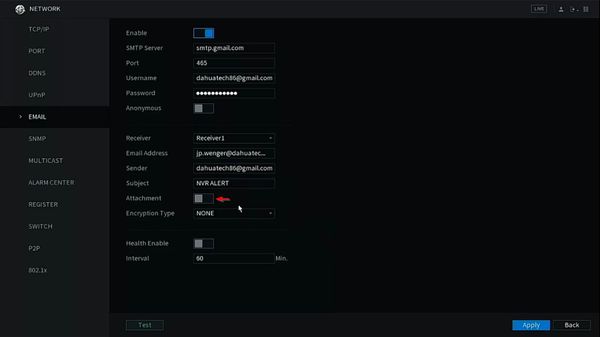
- Attachment
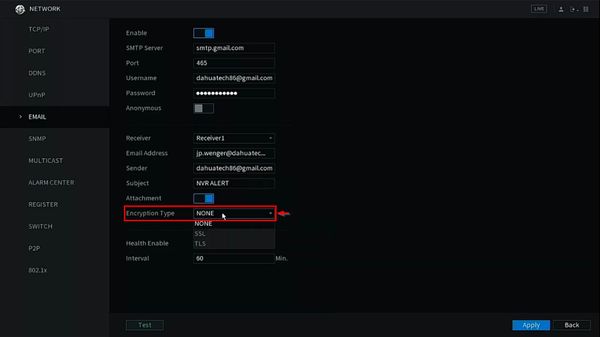
- Encryption Type
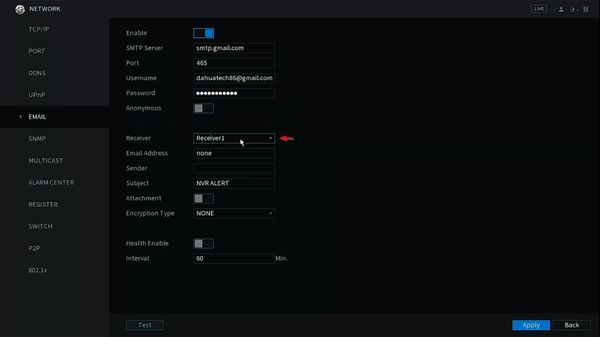
7. Use the dropdown box next to Receiver to select the Receiver #
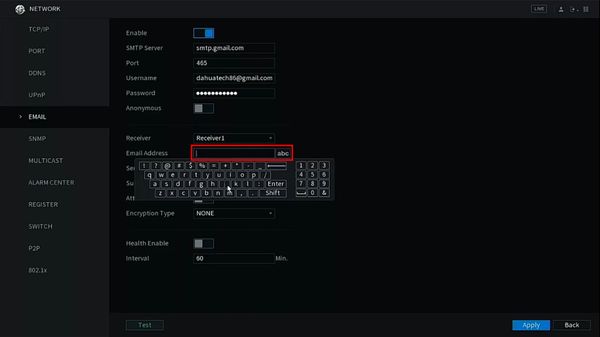
8. Enter the full email address that will receive notifications
9. Enter information for Sender, which will be the email address sending the notification
10. Enter a Subject for the email
11. Toggle the switch next to Attachment to allow an attachment to also be sent with the notification
12. Use the dropdown box to select the Encryption Type for the email server being used
13. Configure additional parameters for Email Notifications as desired:
- Health Enable
- Interval
14. Click Apply to save
Description
Prerequisites
- A temporary gmail account to send from.
- A email to send the notification to.
- A NVR.
Video Instructions
Step by Step Instructions
To get email notification for an NVR on gmail:
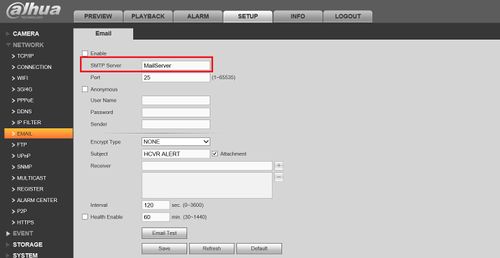
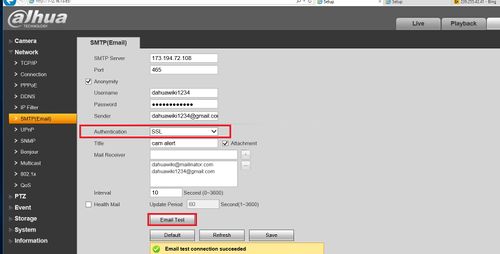
1. Log in to an NVR, go to Setup -> Network -> Email and check Enable in the check box then enter the SMTP Server.
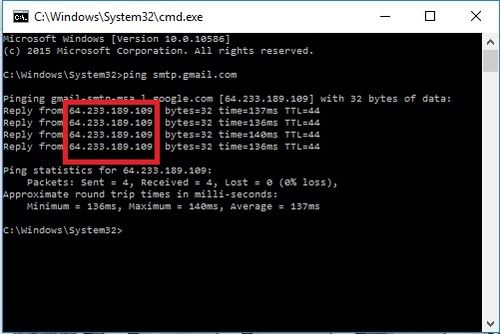
2. To get the SMTP Server, open up command prompt by typing cmd on the windows search bar and type ping smtp.gmail.com to get the IP address.
3. Enter the IP address into the SMTP server.
4. The port number for gmail is 465, and enter the email information that you will be sending the notification from into the username/password/sender. Sender is the full email information.
5. Enter a subject for the email notification and enter a receiver by entering and pressing the plus sign, you may have multiple receiver.
6. Enter a time interval for the frequency of the email if you wish and click save.
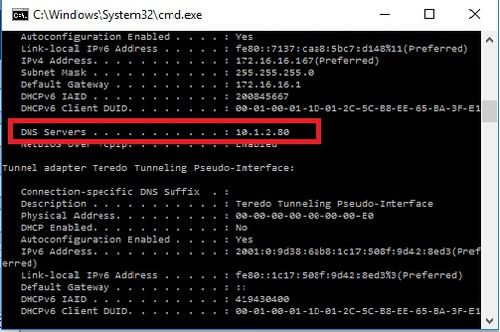
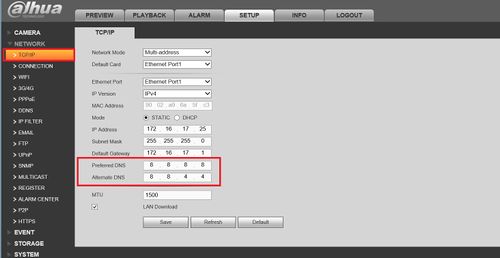
7. Go back to the command prompt and enter ipconfig /all and get the DNS Server.
8. On the NVR go to TCP/IP and enter the information on DNS.
9. Go back to the SMTP menu and make sure the authentication is on SSL, save and press email Test and you should see it on your email.
Additional Gmail Settings
Please make sure your gmail settings on the temporary account are set to Allow less secure apps is set to ON:
1. Log into Gmail account and select the icon in the top right corner.
2. Select Connected apps & sites, then make sure "Allow Less secure apps: ON" is on.
Prerequisites
- DSS Express S
- Email Account credentials
Video Instructions
Step by Step Instructions
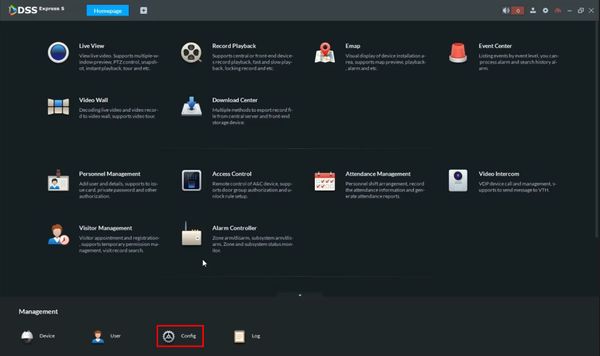
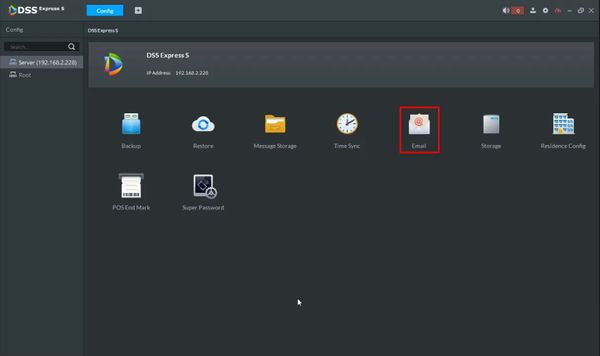
1. From the Homepage of DSS Express S
Click Config
2. Click Email
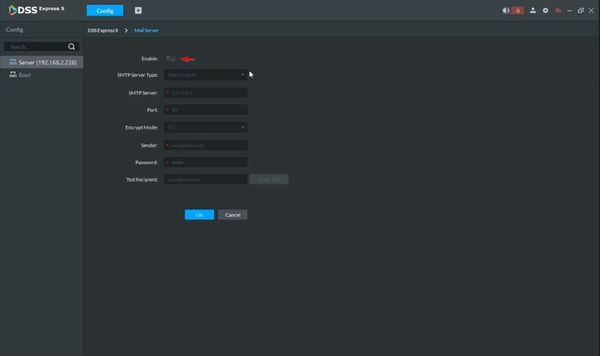
3. Click to enable the email feature
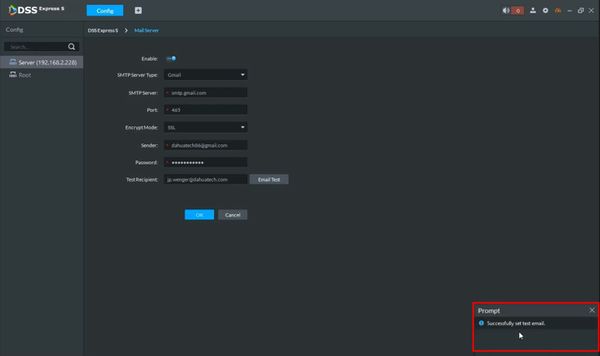
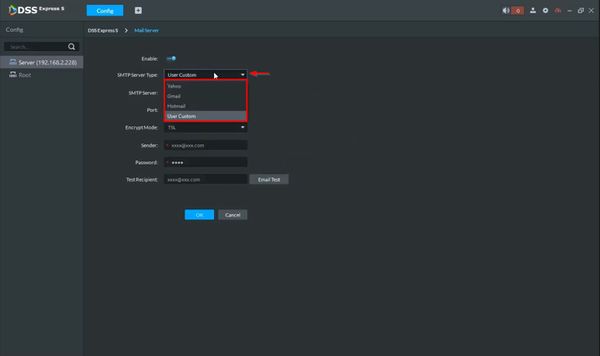
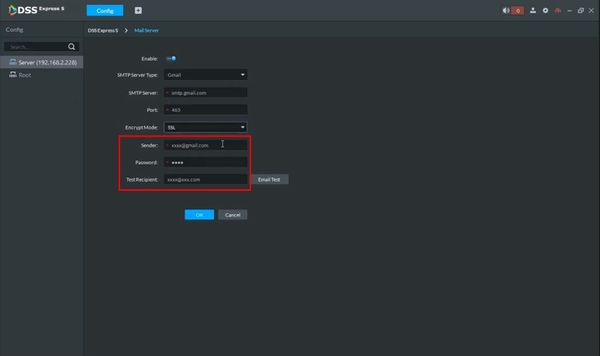
4. Use the dropdown box to select the email server type. There are default settings for the most common email services, such as Gmail, Yahoo and Hotmail. Select User Custom to enter SMTP information for any other email service
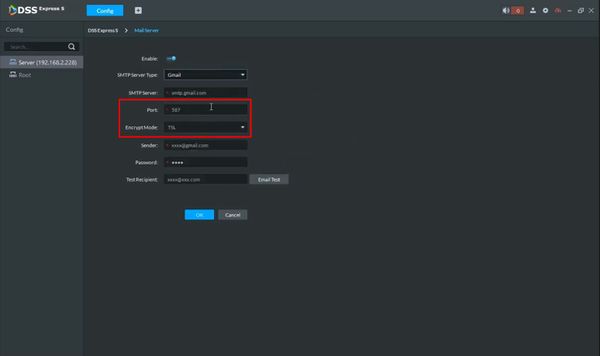
5. Enter the Port
Enter the EncryptMode (Encryption Type) for the email service
6. Enter the account information for the Sender, this will be the email address being used to send emails
Enter the username (including @xxx.com) and password for the email account
Enter a Test Recipient in order to use the Email Test function.
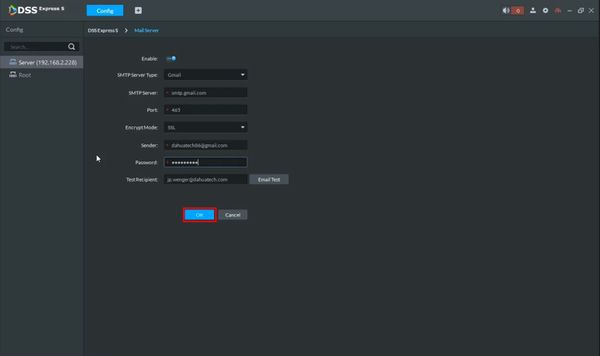
7. Click OK to save
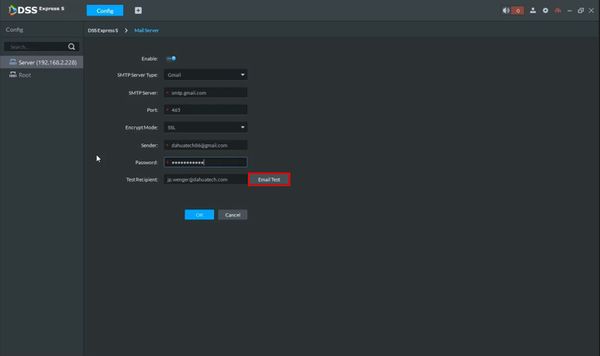
8. To test the email settings click Email Test. A test email will be sent out with the entered information
9. After a few moments a prompt will appear confirming if the test email was sent successfully or not
