Access Control/How To Setup Holiday Schedule in SmartPSS Lite
Contents
How To Setup Holiday Schedule in SmartPSS Lite
Description
This article will cover how to setup a Holiday Schedule for Access Control on SmartPSS Lite
Prerequisites
- Any 2nd Generation Dahua Access Controller
- A Computer with SmartPSS Lite
- Access Control Initial Setup
Video Instructions
Coming Soon
Step by Step Instructions
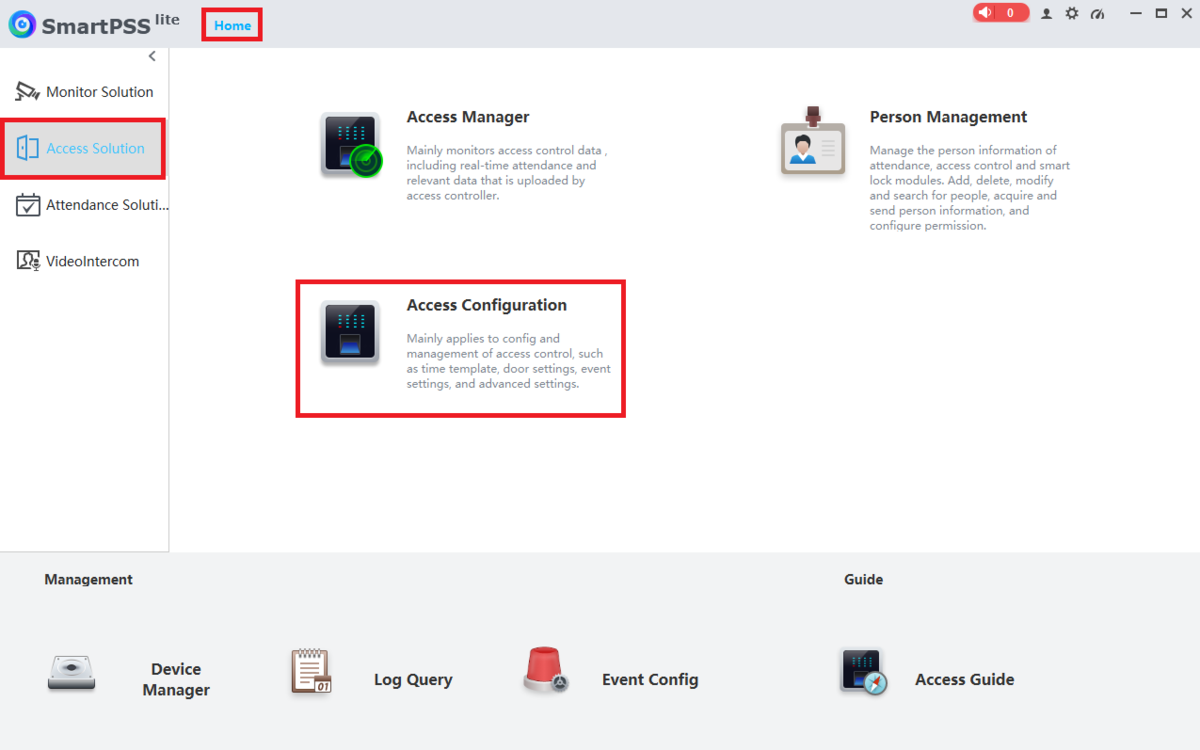
1. Open SmartPSS Lite.
Click on Home at the top.
Click on Access Solution on the left.
Then click on Access Configuration
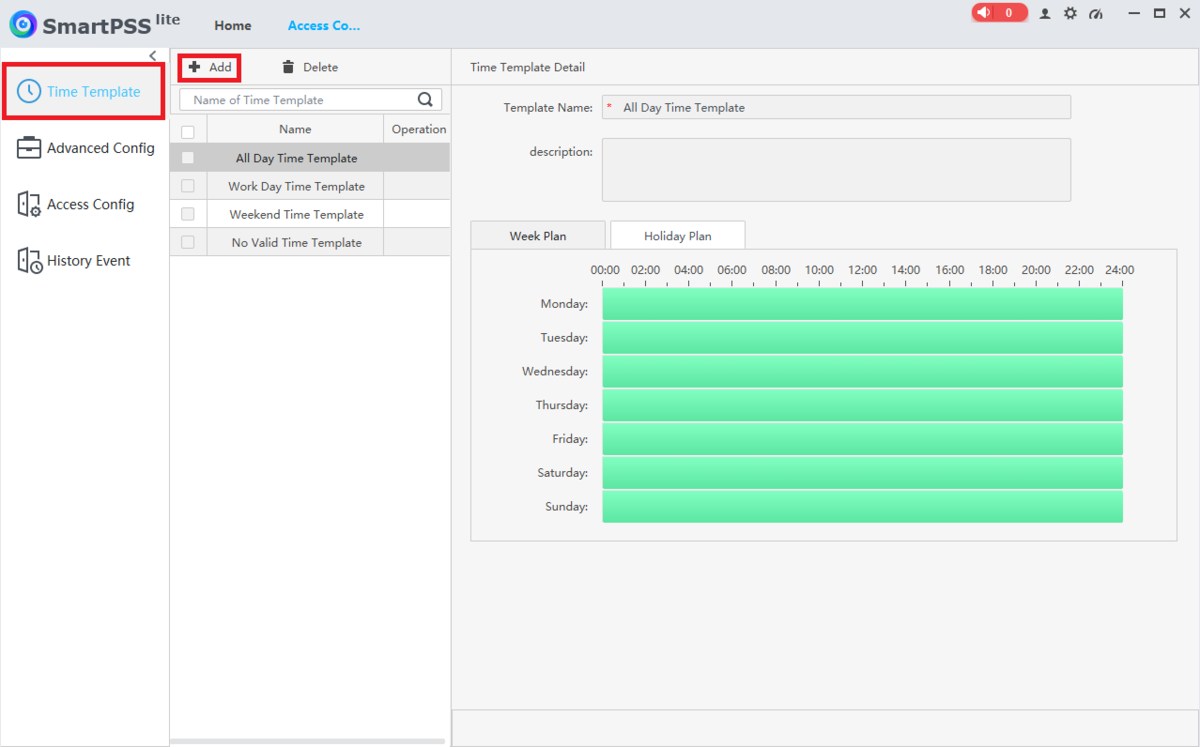
2. Select Time Template on the left.
Then select + Add at the top ot create a new Time Template
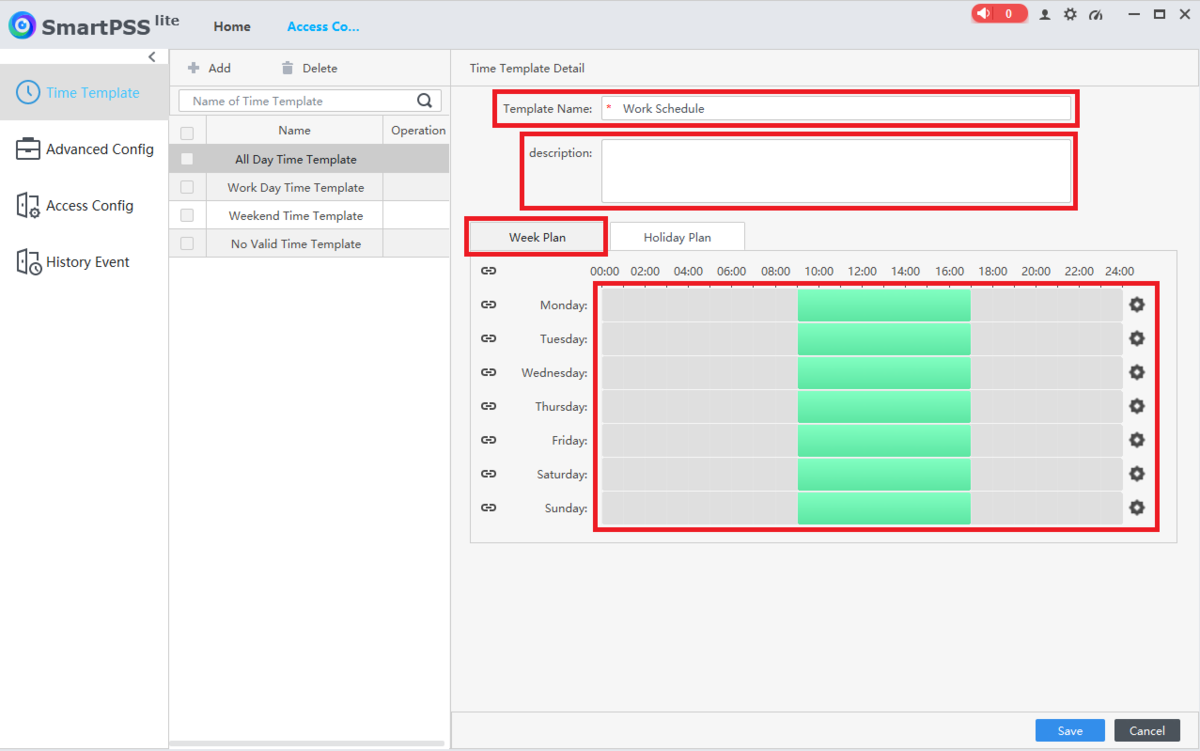
3. Enter a name for the Time Template you are creating in the Template Name field.
Optionally, put in any other extra information in the Description field.
Select the Week Plan tab and then modify the schedule for each day of the week below.
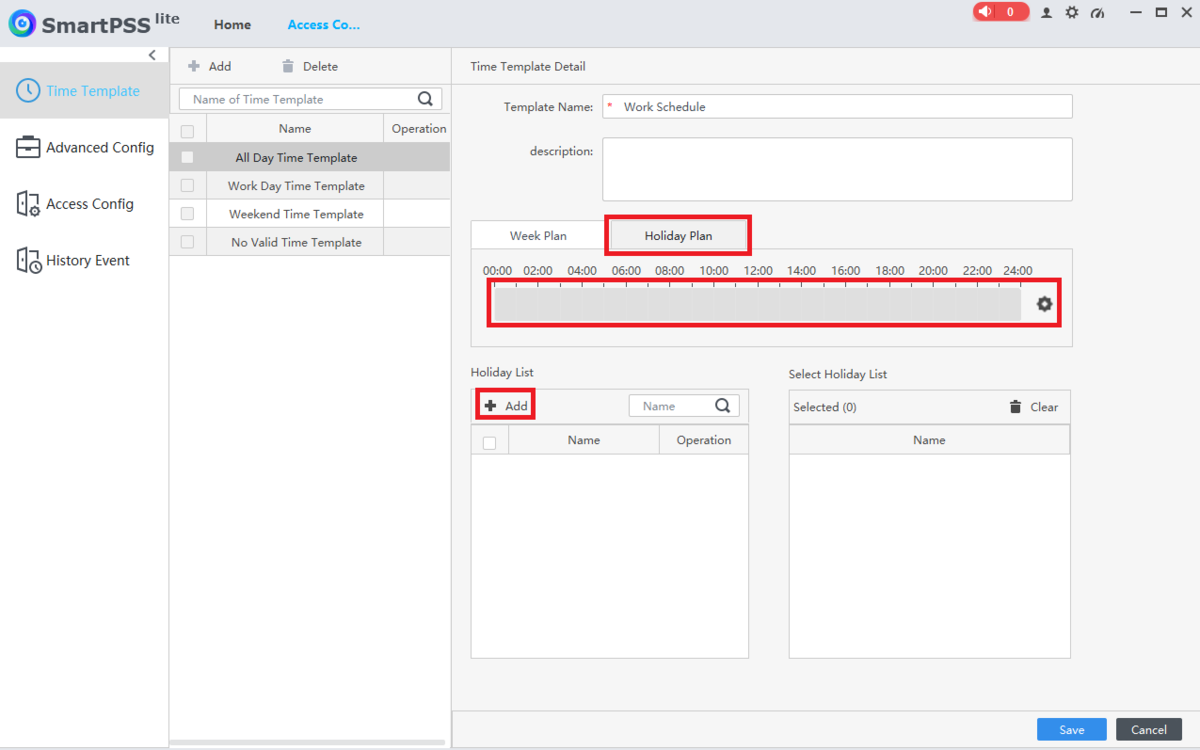
4. Select the Holiday Plan tab.
Then adjust the access schedule for holidays. (Green indicates when the door will stay closed, greyed out means it'll stay open)
Select + Add below "Holiday List" to add a specific day as a holiday
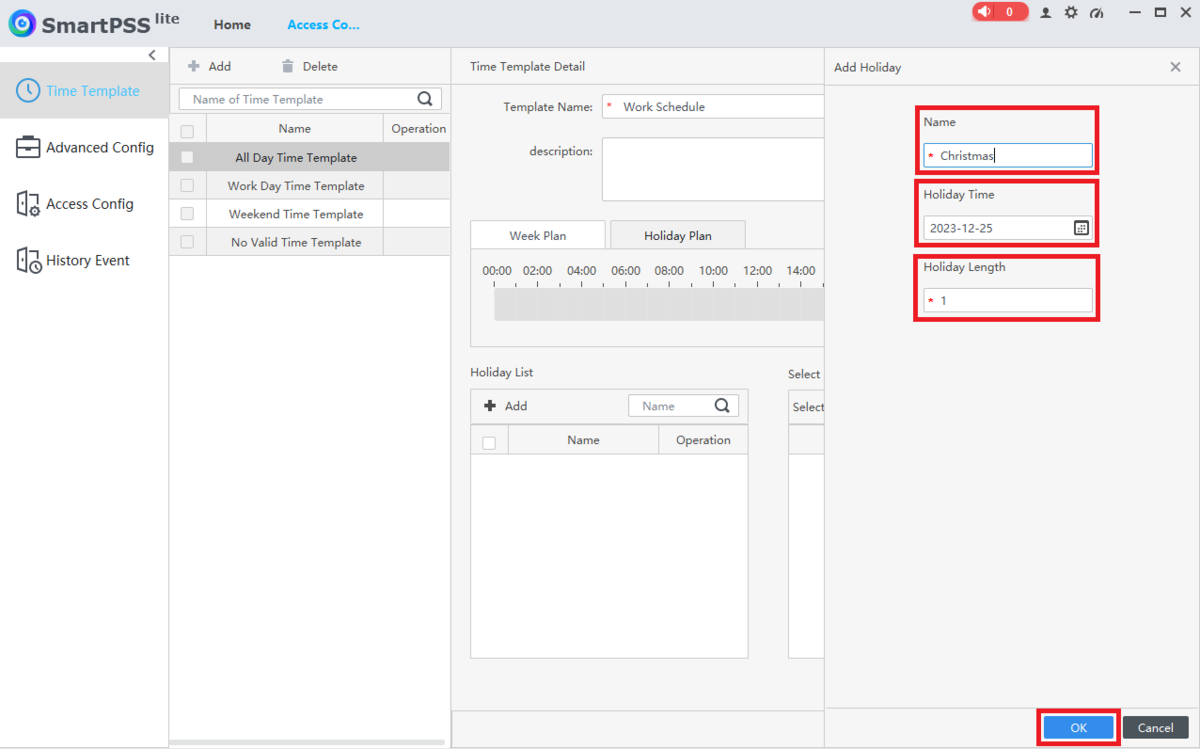
5. Enter the name of this holiday in the Name field.
Click on the calendar icon in the Holiday Time field and set it to the day this holiday will start.
Then enter a number in the Holiday Length field for how many days the holiday will last.
Click on OK at the bottom
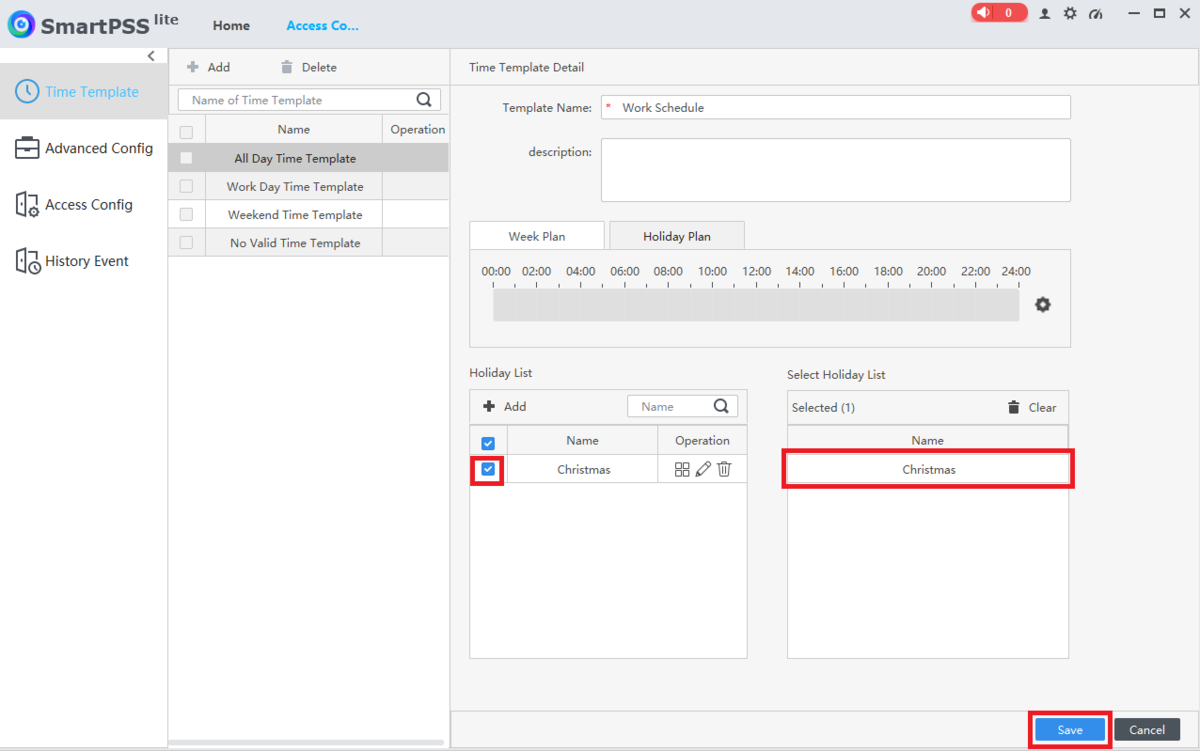
6. The holiday you just created will appear in the "Holiday List" on the left.
You can repeat the process from Steps 4-5 above for more holidays.
Once you have all the holidays you want in the list on the left, check the boxes next each holiday to make them active on this Time Template.
Select Save at the bottom
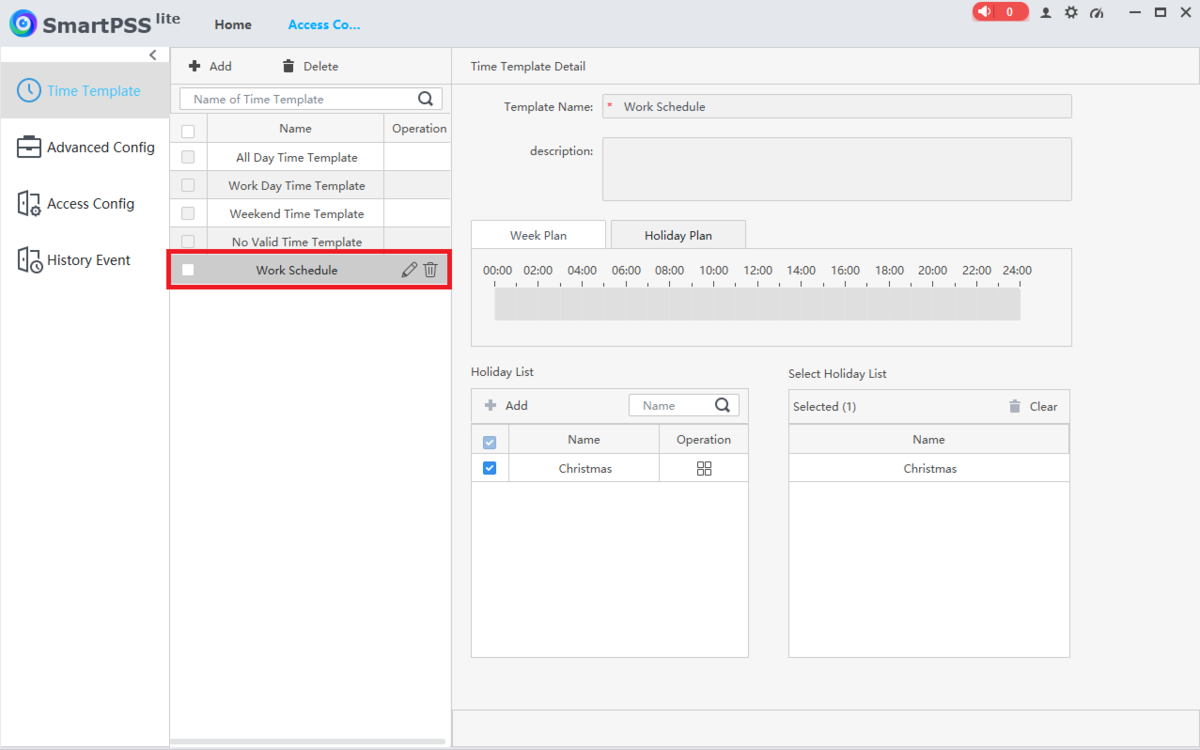
7. You will now see the Time Template you just created (which includes the Holiday Schdule) in the list on the left
