Access Control/How To Setup First Card Unlock in SmartPSS Lite
Contents
How To Setup First Card Unlock in SmartPSS Lite
Description
This article will cover how to setup First Card Unlock for Access Control on SmartPSS Lite
Prerequisites
- Any 2nd Generation Dahua Access Controller
- A Computer with SmartPSS Lite Installed
- Access Control Initial Setup (Including Creating Users and Configuring User Permissions)
Video Instructions
Coming Soon
Step by Step Instructions
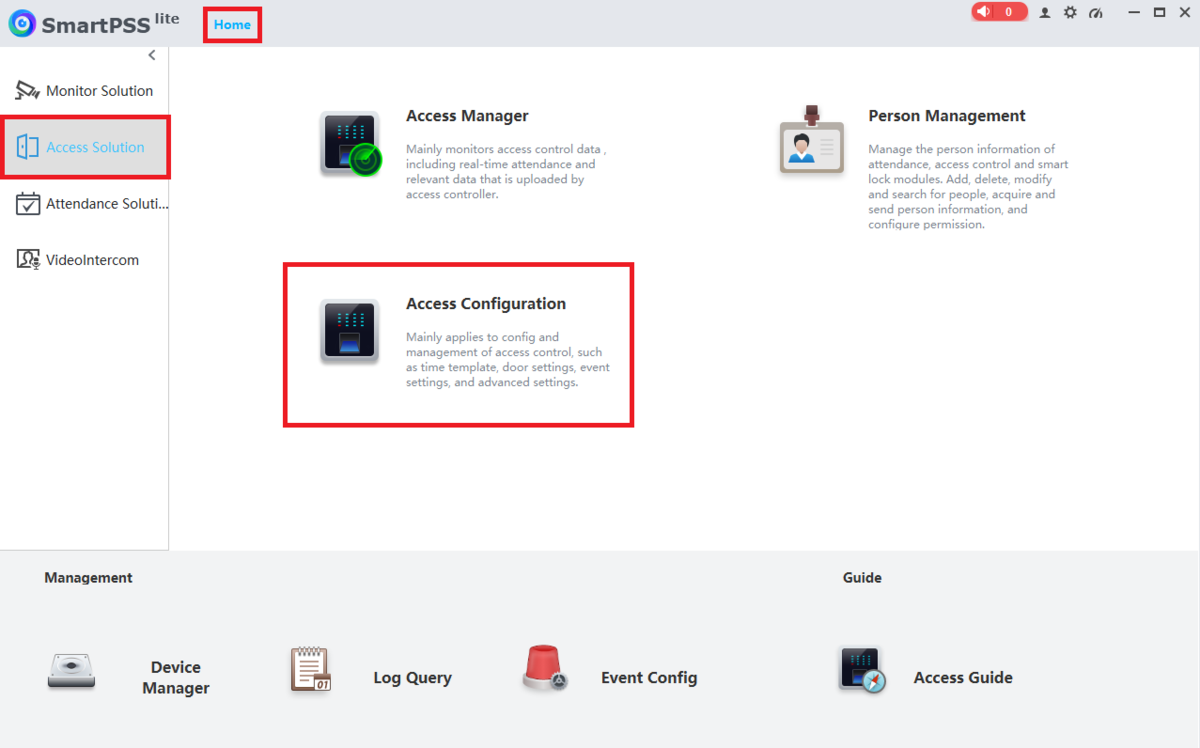
1. Open SmartPSS Lite.
Click on Home at the top.
Click on Access Solution on the left.
Then click on Access Configuration
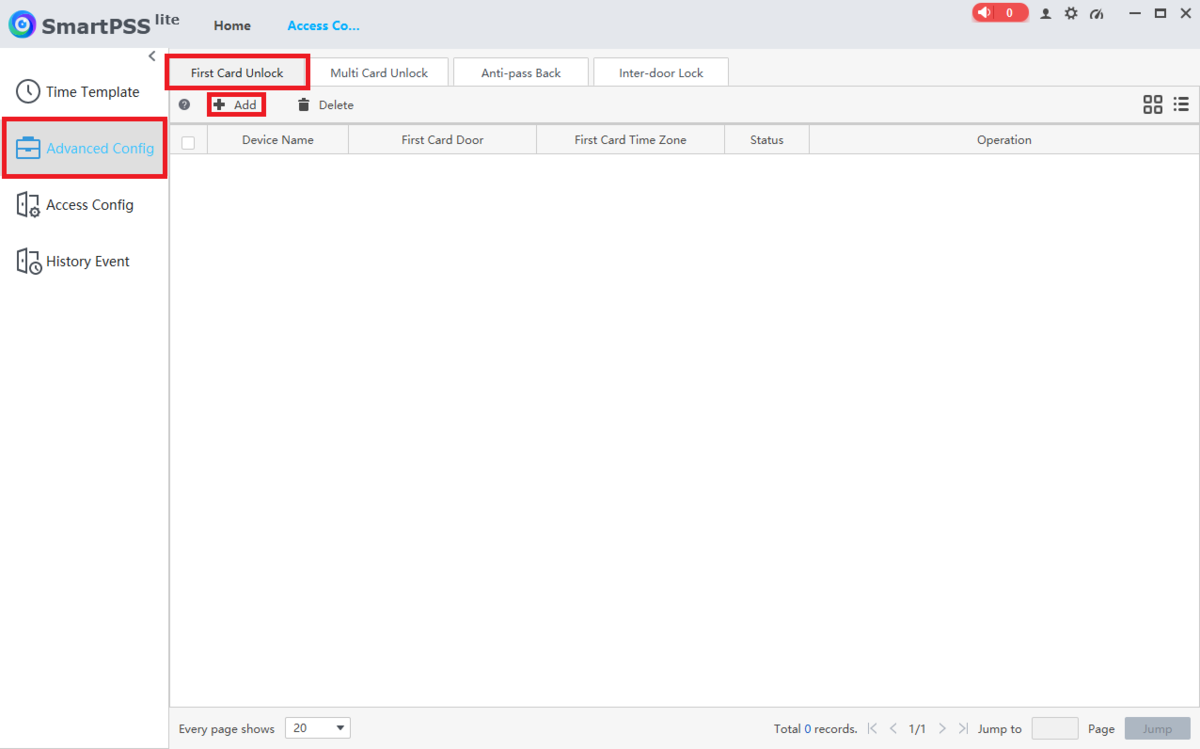
2. Click on Advanced Config on the left.
Click on the First Card Unlock tab at the top.
Then click on + Add at the top
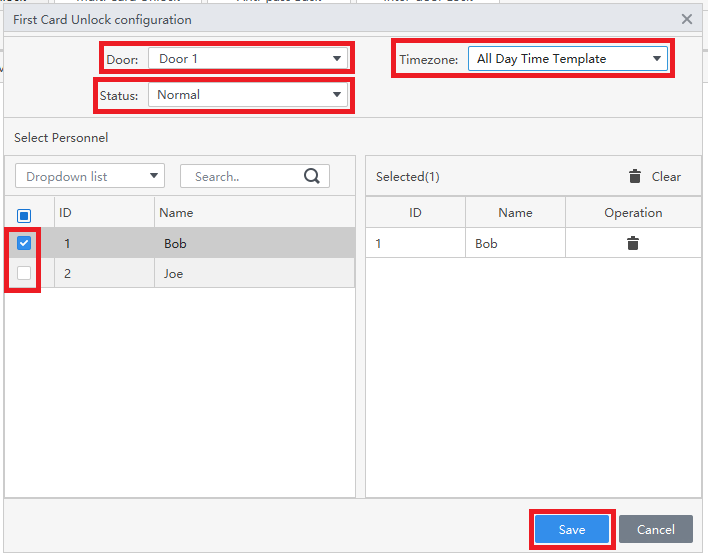
3. Click on the drop-down list next to Door and select the door you want to apply this rule to.
Click on the drop-down list next to Status and select either Normal to have the door stay locked until a valid card is presented after the first card unlock card is swipped, or select Always Open to have the door stay up after the first card unlock card is swiped.
Click on the drop-down list next to Timezone and select the Timezone schedule you want this rule to follow.
Then check the box(es) next to the users you want to allow to be the first card unlock user(s).
And click on Save at the bottom
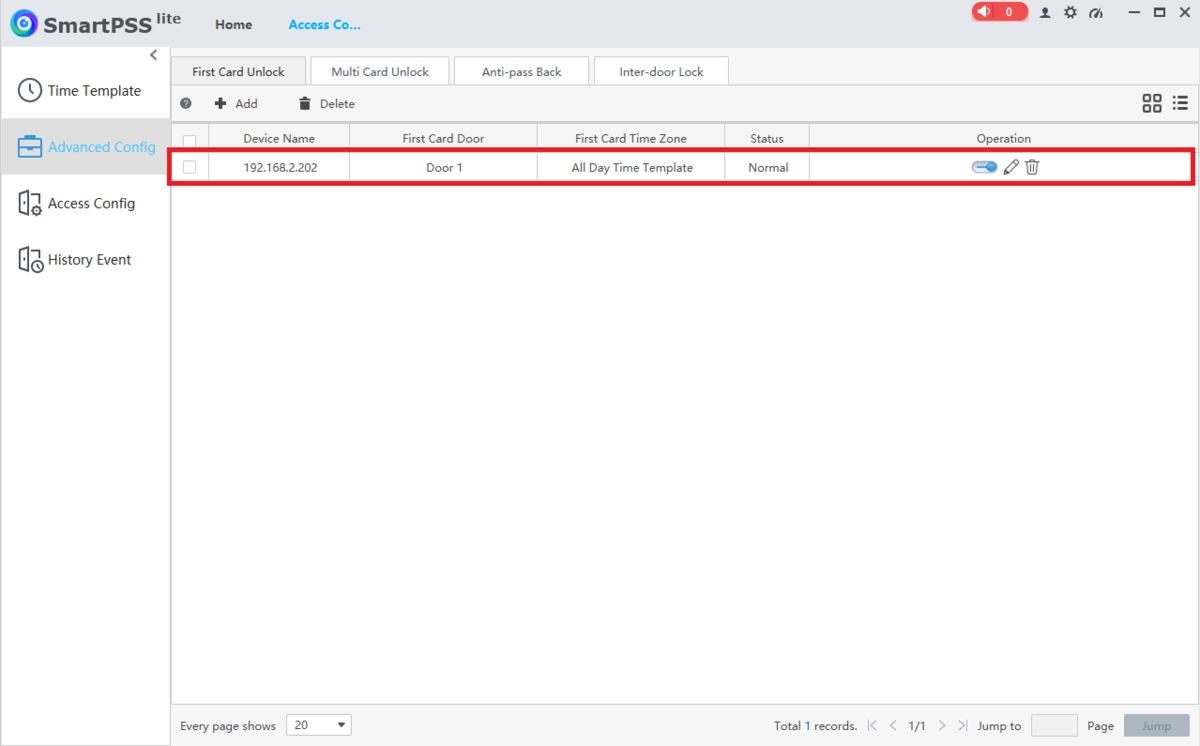
4. You will now see the rule in the list.
Now the door will remain locked to all users until one of the first card unlock users swipes their card.


