Parking Lot Entrance Management
Contents
Description
DSS can manage multiple parking lot entrances and can work with multiple ANPR cameras setup at entry and exit points.
DSS can accurately determine how many vehicles are in a parking lot based on the number of entry and exit points.
You can also setup the number of parking spots for each parking lot.
Prerequisites
- Dahua ANPR Camera
- Dahua NVR
- DSS
- Computer for configuration
Instructions
| Configure LPR Camera | |||||
|---|---|---|---|---|---|
| Set up and configure the LPR camera > How To Install and Setup DMSS |
| Add ANPR Camera to DSS | |||||
|---|---|---|---|---|---|
| DSS Client | DSS Manager Portal | ||||
Configure LPR Camera
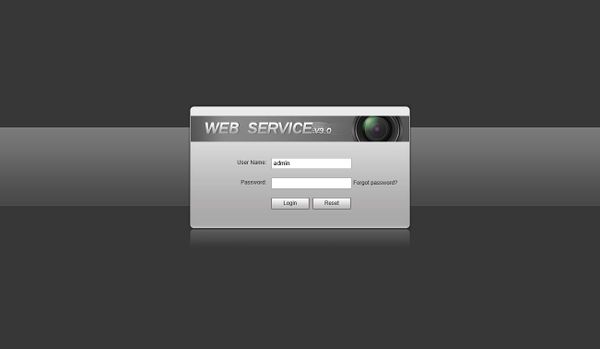
Log into the Web UI of the camera by typing the IP into a web browser.
Enter the username/password and click Login
- Click the Guide tab.
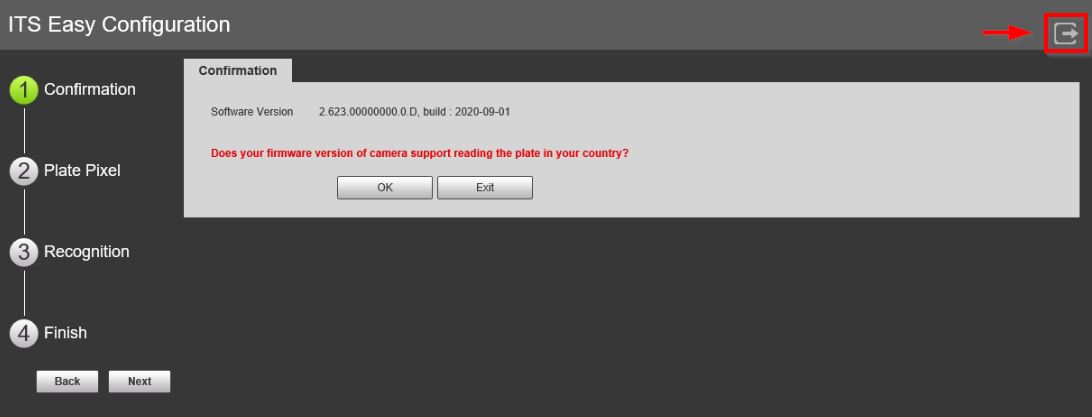
On the Guide interface, you can configure capture scenarios. You can click at at the upper-right corner of Guide interface to exit at anytime.
1. Confirmation
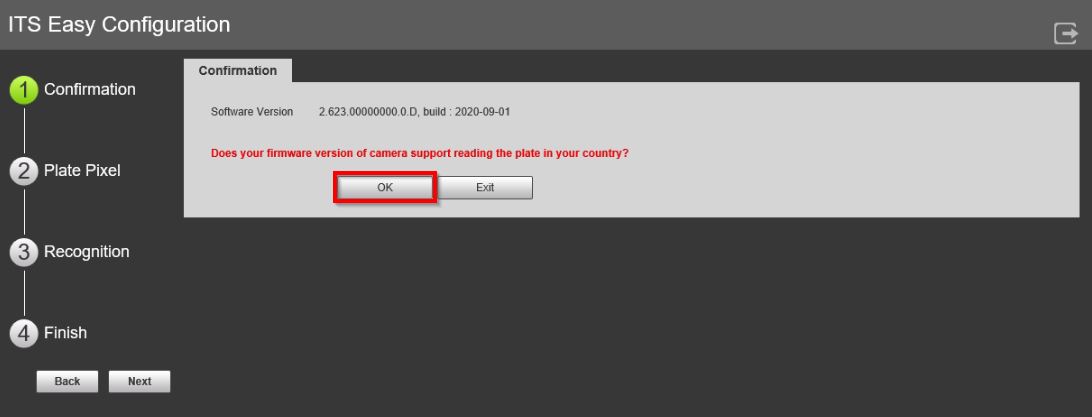
- Confirm the Software Version is the latest (Visit the Product page for latest firmware version - Link), and then click OK.
2. Plate Pixel
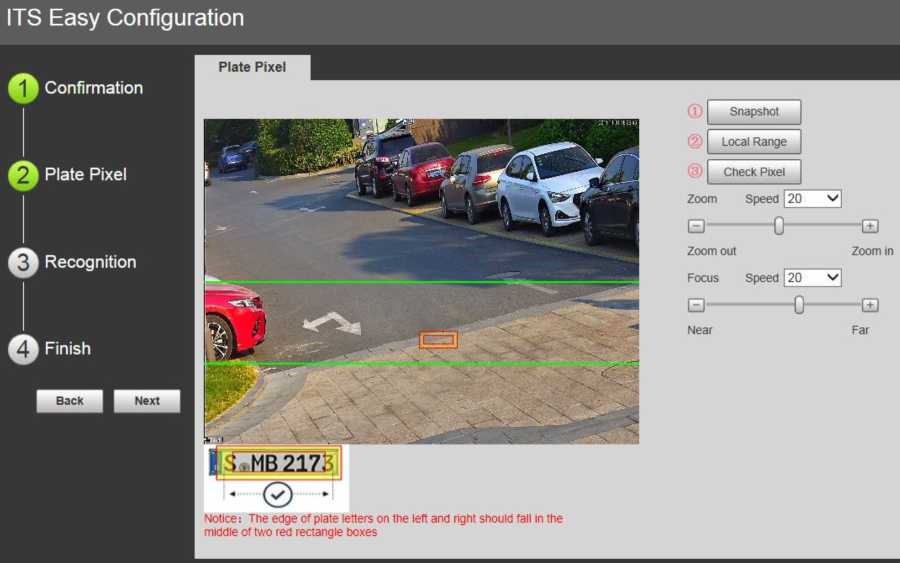
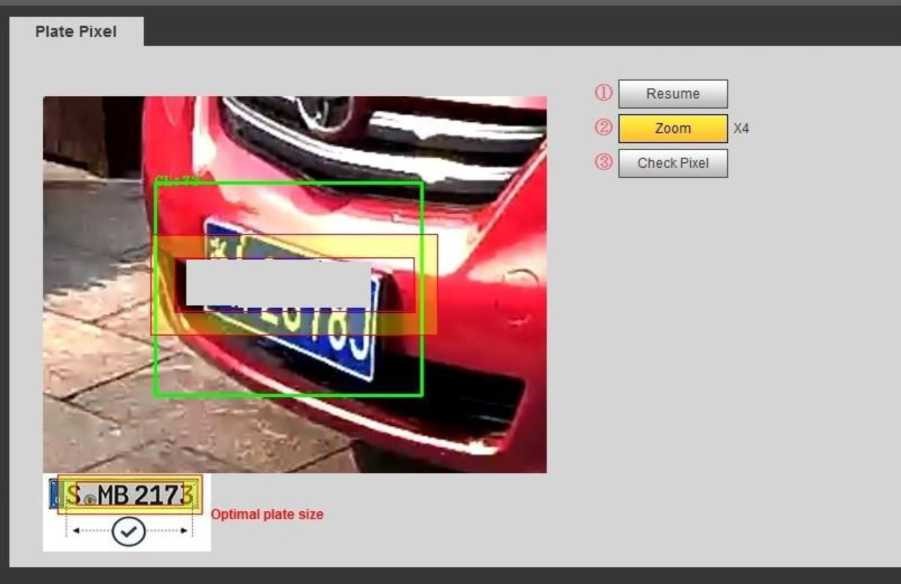
- You can check whether the video image is properly zoomed and focused by checking the plate pixel.
Below the video frame there is an example of the optimal plate positioning:
Use the Pixel Plate settings to adjust the camera for zoom and focus
- Drag the Zoom and Focus bar to adjust the image properly
- Position a vehicle/plate into the camera's view
Click Snapshot to take a snapshot of the plate (Snapshot button will become Resume)
- Drag the yellow box to the position of the plate
- Click Local Range to zoom the picture by 2x or 4x zoom rate (if required)
- Continue to adjust the position yellow box to make it optimal plate size:
If the plate within the yellow box is larger than the optimal plate size in the example, zoom out the video image; if smaller, zoom in the video image.
It may also require reviewing proper mounting requirements/positions if any softw3are adjustments do not allow for optimal plate positioning.
- Once the plate is in optimal position, click Check Pixel. Click Yes to confirm.
3. Recognition
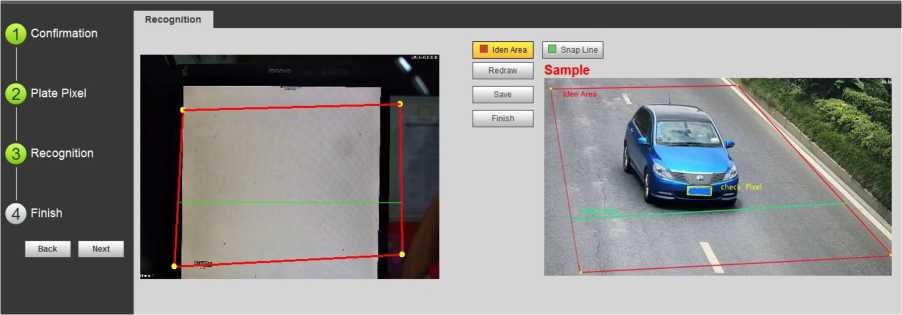
- This section will configure the recognition/identification area for detection of license plates. The sample image can be used as a reference
A sample Identification Area and Snap Line will be displayed.
To clear or Redraw these Click either Iden Area ![]() or Snap Line
or Snap Line ![]()
To create new Recognition settings:
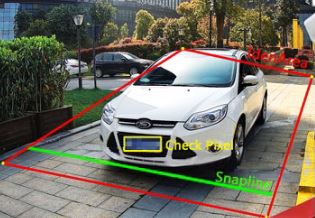
Click and draw 4 lines on the video frame to create a recognition area. Only plates in this area will be detected.
Draw snap line by dragging mouse on the area. The snap line must cross the area. Vehicles passing this line will trigger plate detection.
3) Click Save to complete the Setup.
Click Finish, exit Guide interface and enter Live interface.
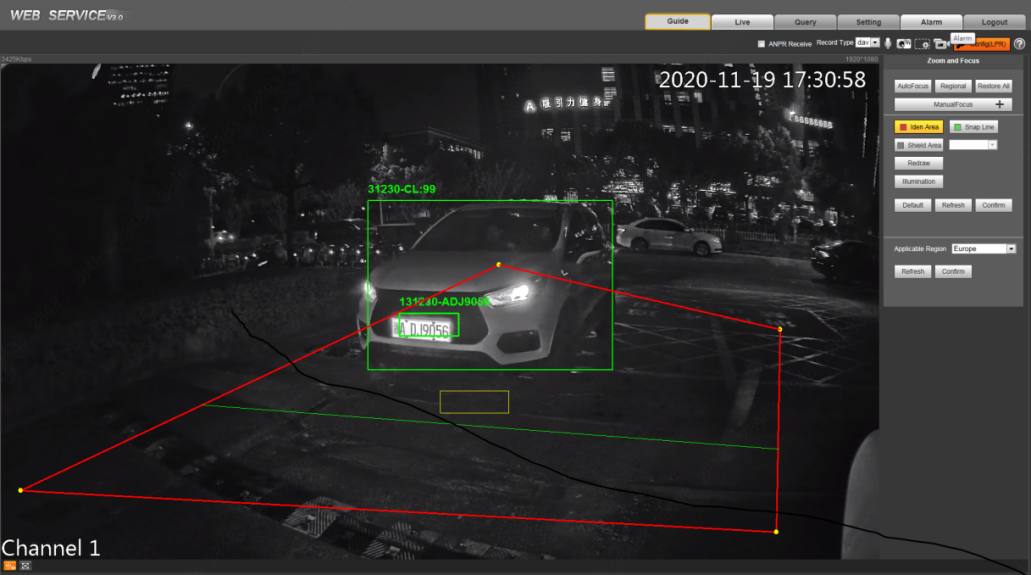
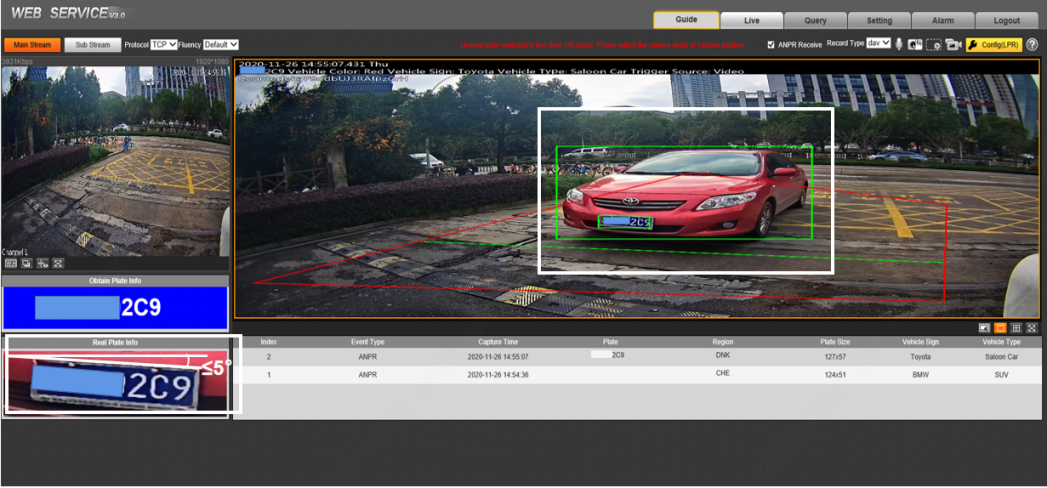
Example at Live interface:
- Make sure the vehicle is within the red identification area line
- The green snap line is about 1/3 of the road
- Angle between the bottom of the license plate and the screen ≤5°
- The license plate has more than 140 pixels.
↓
Prerequisites
- Dahua device with network connection
- Local windows computer
- Firmware file for device downloaded to computer
Video Instructions
Step by Step Instructions
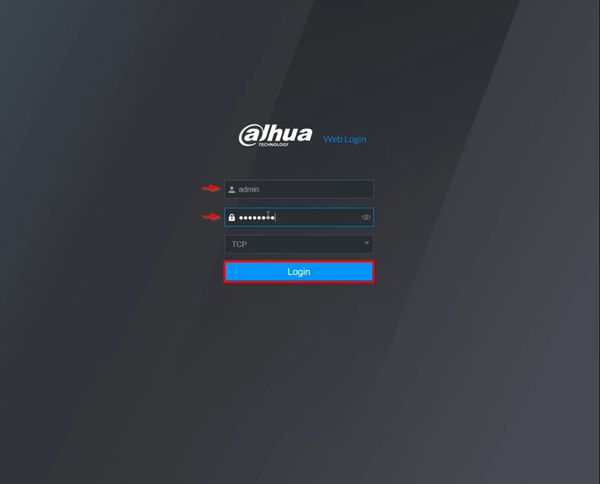
1. Enter the IP of the device into a browser
At the Web Login
Enter the Username and Password
Click Login
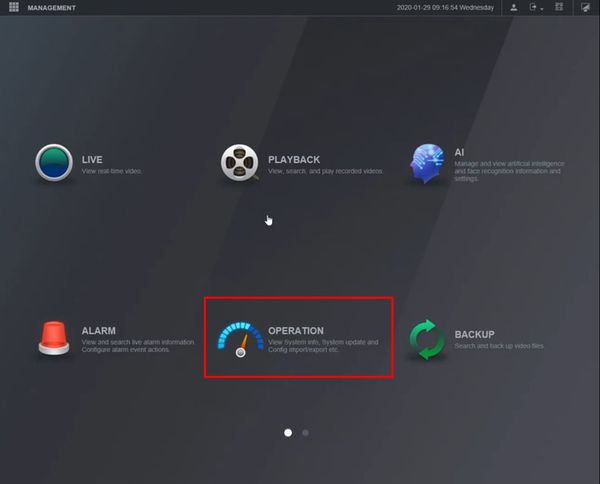
2. Click Operation
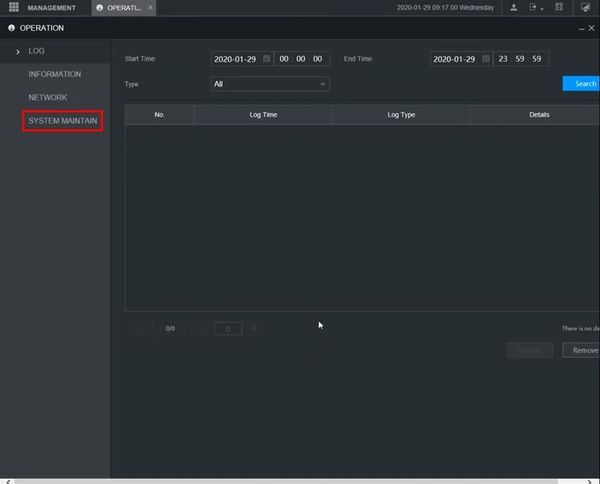
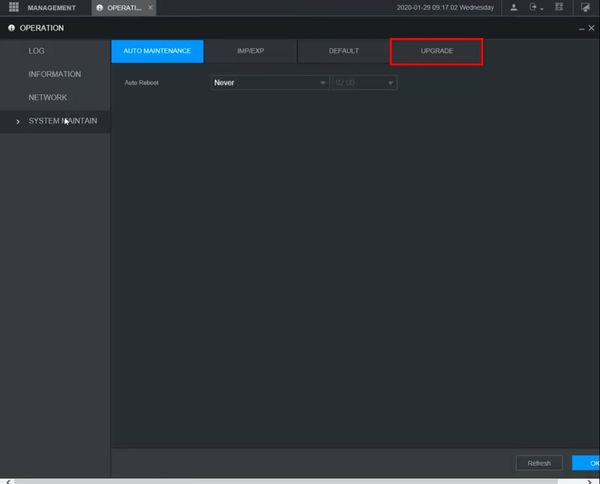
3. Click System Maintain
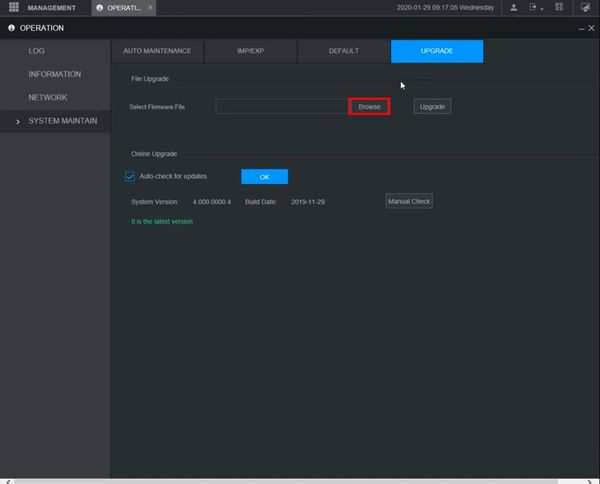
4. Click Upgrade
5. Click Browser
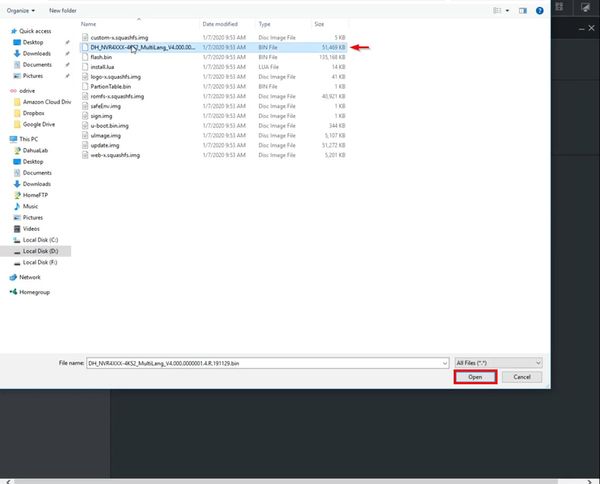
6. Locate the firmware file
Click Open
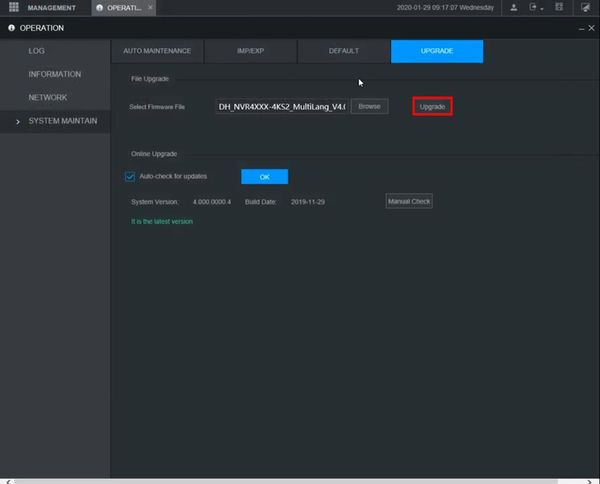
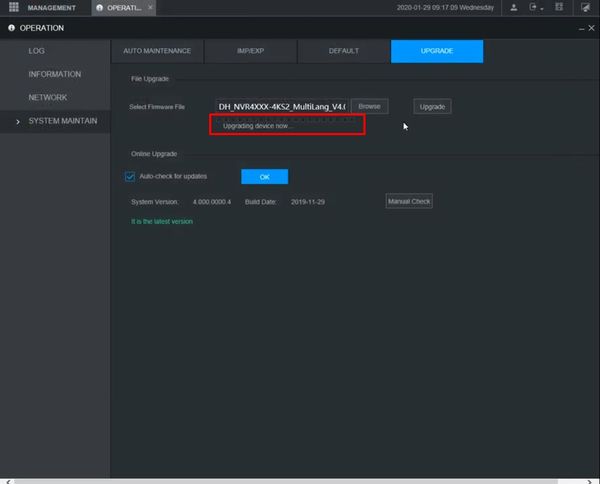
7. Click Upgrade to begin the update process
8. A message will appear to confirm the upgrade process
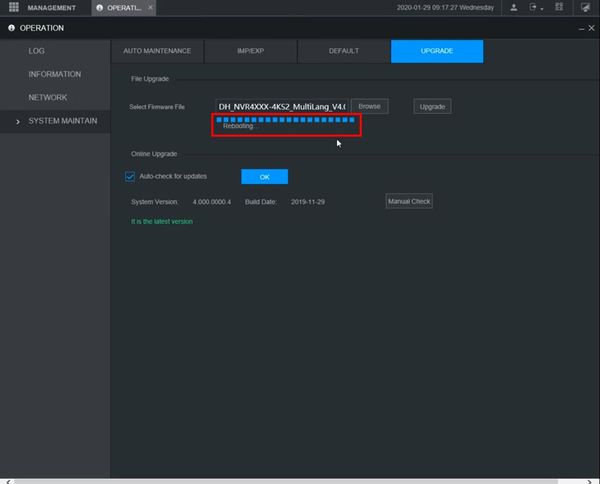
9. When the upgrade is complete the device will reboot
Live
↓

