NVR/Recording Setup/Time Lapse
Contents
Time Lapse Recording
Description
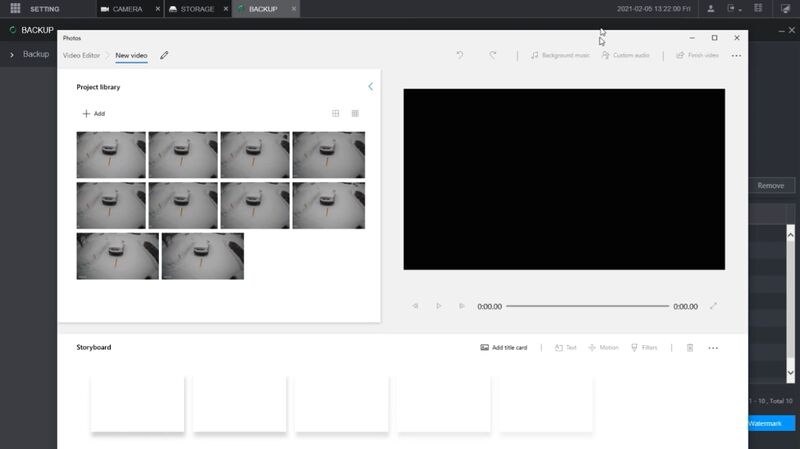
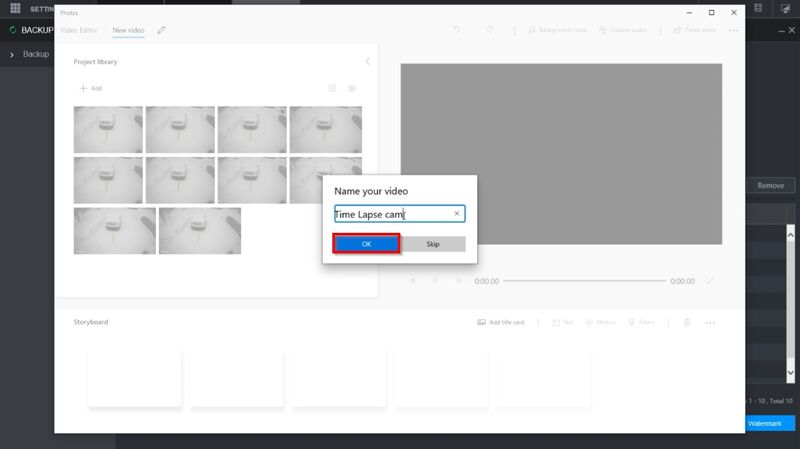
This guide will show how to set up continuous Snapshot recording for a Dahua recorder and camera to enable the ability to export snapshot images and create a time lapse video.
Prerequisites
- Dahua recorder with camera added
- PC running Windows 10
Video Instructions
Step by Step Instructions
Configure Snapshot Recording
1. Log into the NVR
Select the Camera menu
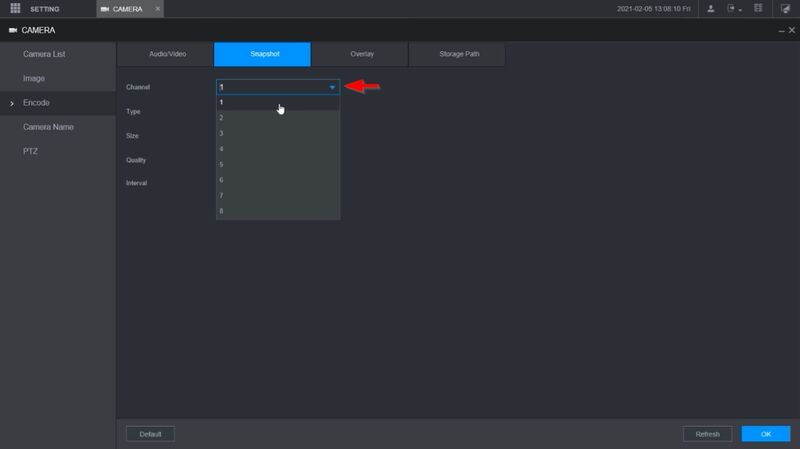
2. Click Encode
Select the Snapshot tab
3. Use the drop-down box to select the Channel/camera to record
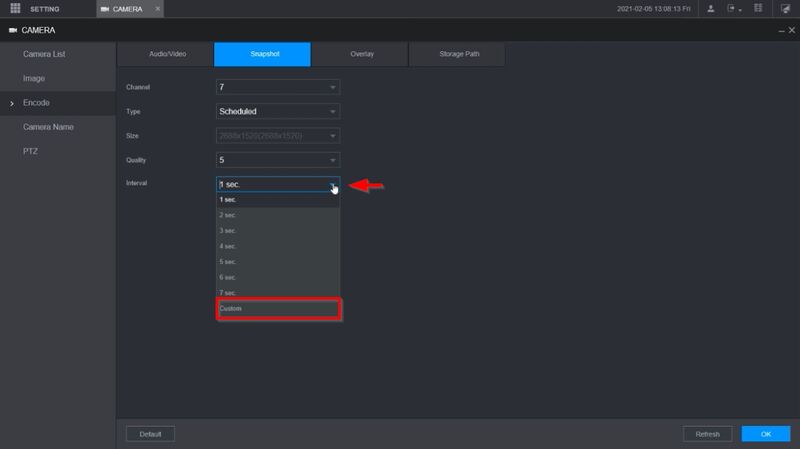
4. Use the drop-down box next to Interval to select Custom
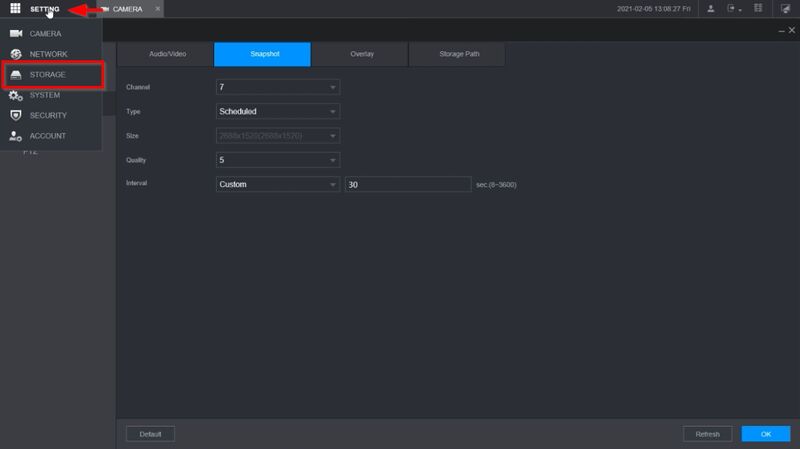
5. Enter a time range, in seconds from 8-3600 in the field.
This will be the interval snapshots are taken.
Click OK to save
6. Click Setting > Storage
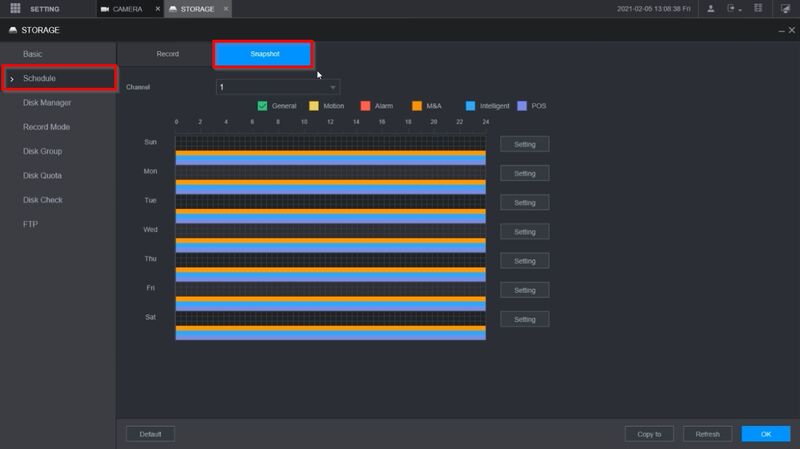
7. Select Schedule
Select the Snapshot tab
8. Use the drop-down box to select the channel/camera
Click Setting
9. Select the days and time to record (all) and General record type selected
Click OK to save
Click OK to save
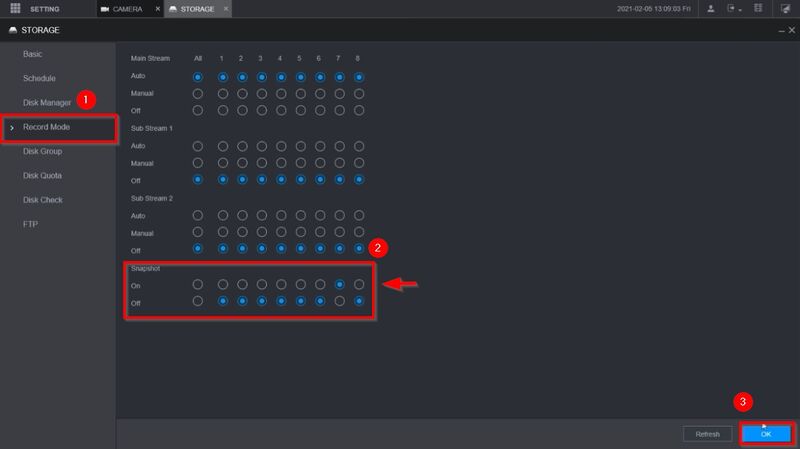
10. Select Record Mode
Enable the Snapshot for the Channel/camera number
Toggle to On
Click OK
Export Snapshot Images
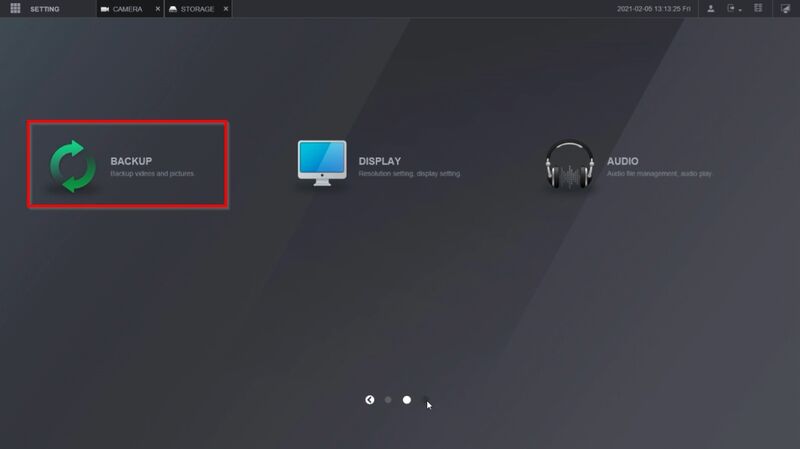
1. From Main Menu
Use the arrow to move to the second page of the menu
2. Select Backup
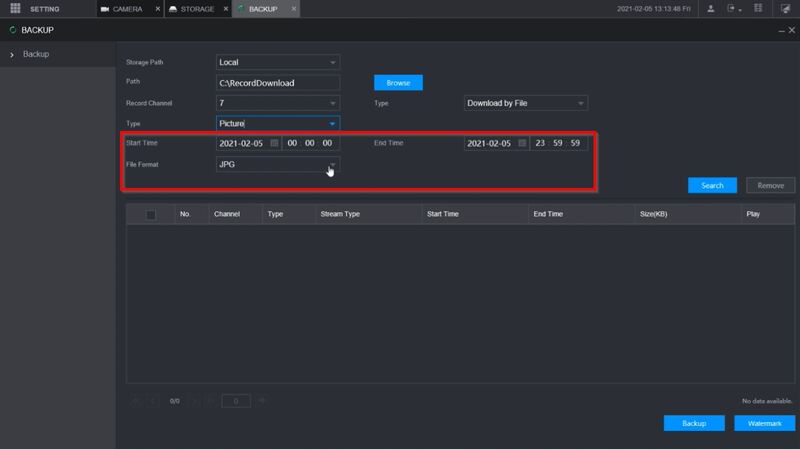
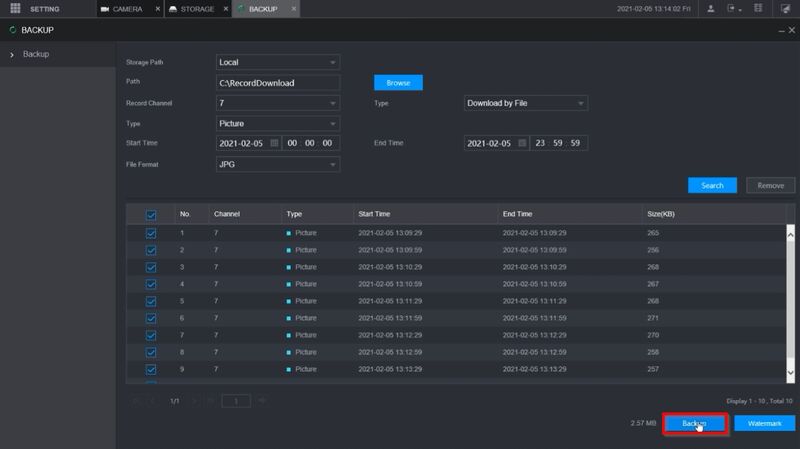
3. Enter the parameters for the Backup:
Storage Path: Select Local Path: Click Browse and select a location on the computer Record Channel: Select the channel/camera with recorded snapshot Type: Download by File / Picture
4. Enter a date range using Start Time and End Time menu
File Format: JPG
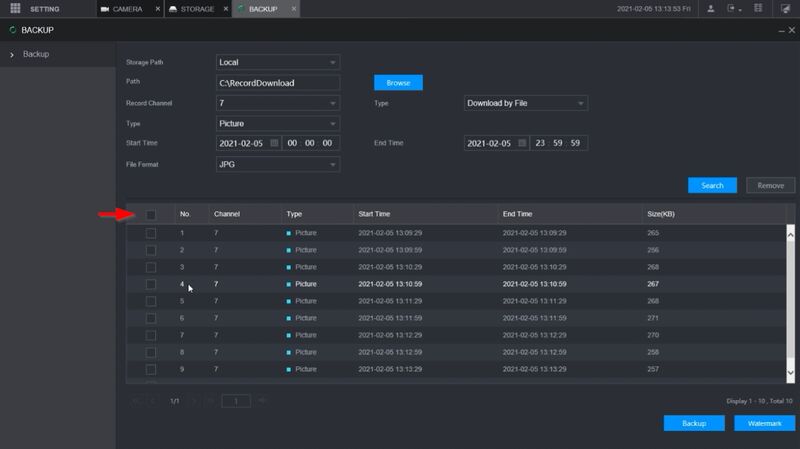
5. Click Search
6. The results of the search will be displayed.
Click the top box to select all items
Click Backup
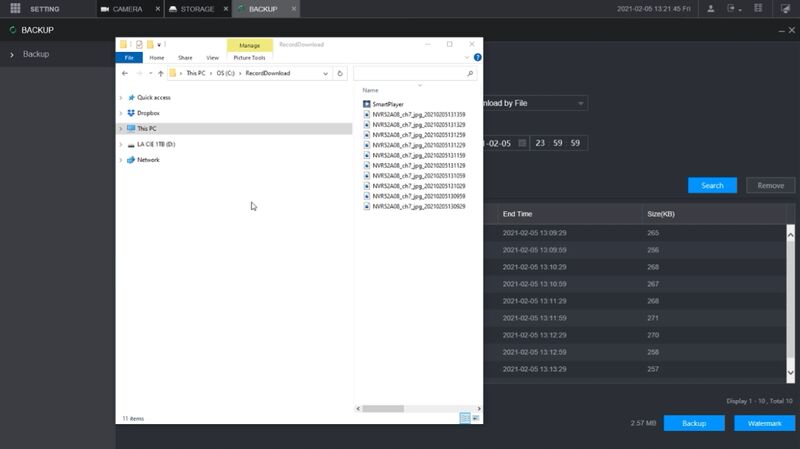
Once the operation is complete, the snapshots will be in the folder set as Path


