Difference between revisions of "Thermal/Temperature Monitoring/Stand Alone Camera Setup"
(→Step by Step Instructions) |
(→Step by Step Instructions) |
||
| Line 25: | Line 25: | ||
[[File:Temperature_Monitoring_Stand_Alone_Camera_Diagram.png|450px]] | [[File:Temperature_Monitoring_Stand_Alone_Camera_Diagram.png|450px]] | ||
| + | 1. Enter the IP address of the Camera(default http://192.168.1.108) in Internet Explorer | ||
[[File:Temperature_Monitoring_-_Stand_Alone_Setup_-_1.jpg|700px]] | [[File:Temperature_Monitoring_-_Stand_Alone_Setup_-_1.jpg|700px]] | ||
| + | |||
| + | Proceed with Device Initialization | ||
| + | |||
| + | Create a '''password''' for the Camera and enter twice to Confirm | ||
| + | |||
| + | Enter an email address used for Password Recovery/Reset | ||
| + | |||
| + | Click '''Save''' | ||
[[File:Temperature_Monitoring_-_Stand_Alone_Setup_-_2.jpg|700px]] | [[File:Temperature_Monitoring_-_Stand_Alone_Setup_-_2.jpg|700px]] | ||
| + | |||
| + | Check the box to agree to the terms | ||
| + | |||
| + | Click '''Next''' | ||
[[File:Temperature_Monitoring_-_Stand_Alone_Setup_-_3.jpg|700px]] | [[File:Temperature_Monitoring_-_Stand_Alone_Setup_-_3.jpg|700px]] | ||
| + | |||
| + | Set P2P settings as desired | ||
[[File:Temperature_Monitoring_-_Stand_Alone_Setup_-_4.jpg|700px]] | [[File:Temperature_Monitoring_-_Stand_Alone_Setup_-_4.jpg|700px]] | ||
| + | |||
| + | Camera initialization is complete | ||
| + | |||
| + | Enter the username (admin) and password created in the previous step | ||
| + | |||
| + | Click '''Login''' | ||
[[File:Temperature_Monitoring_-_Stand_Alone_Setup_-_5.jpg|700px]] | [[File:Temperature_Monitoring_-_Stand_Alone_Setup_-_5.jpg|700px]] | ||
Latest revision as of 22:43, 28 April 2020
Temperature Monitoring Solution Stand Alone Camera Setup
This guide will cover the initial camera setup and Blackbody Configuration for the Thermal Temperature Monitoring Solution for a camera connected to LAN.
If you're using a camera connected to the NVR, follow the steps to set up Thermal Monitoring solution with NVR
Prerequisites
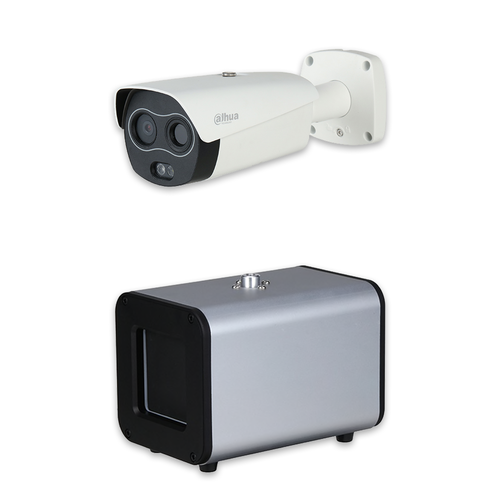
- DH-TPC-BF3221-T or DH-TPC-BF5421-T Thermal Hybrid Network Camera
- JQ-D70Z Blackbody
- Temperature Monitoring Physical Setup guide followed
- Thermal camera updated to latest firmware - How To Update TPC-BF5421-T Firmware
Video Instructions
Step by Step Instructions
Camera Initialization
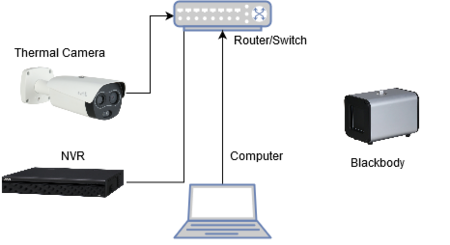
Initialize the Camera over the network using a local computer
- Plug the Thermal camera into the LAN
- Connect the NVR to a router/switch on LAN
- Connect computer to router/switch on LAN
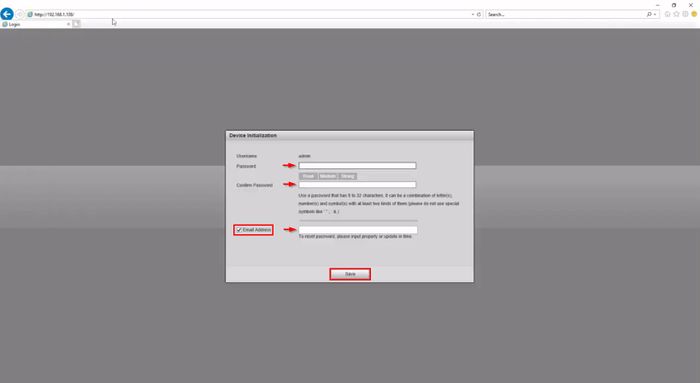
1. Enter the IP address of the Camera(default http://192.168.1.108) in Internet Explorer
Proceed with Device Initialization
Create a password for the Camera and enter twice to Confirm
Enter an email address used for Password Recovery/Reset
Click Save
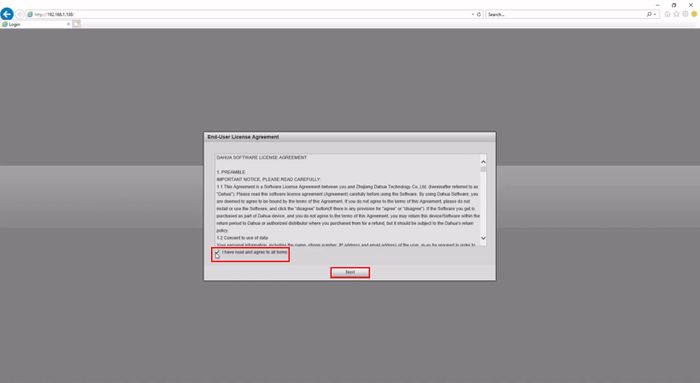
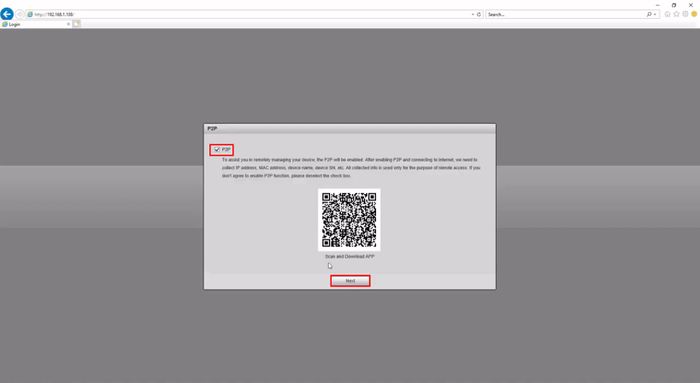
Check the box to agree to the terms
Click Next
Set P2P settings as desired
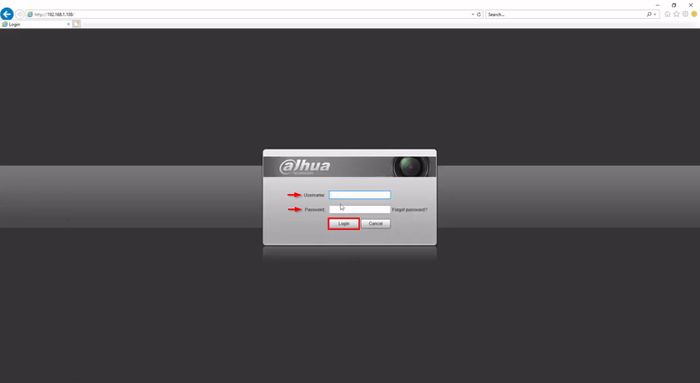
Camera initialization is complete
Enter the username (admin) and password created in the previous step
Click Login
Camera Configuration:
Check latest firmware and upgrade
Open smart thermal of human body temperature measurement
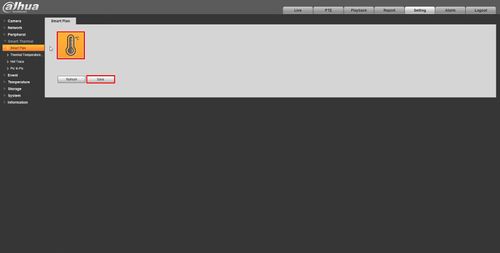
Enable the Smart Thermal Smart Plan for the Thermal Camera
- Log into Camera
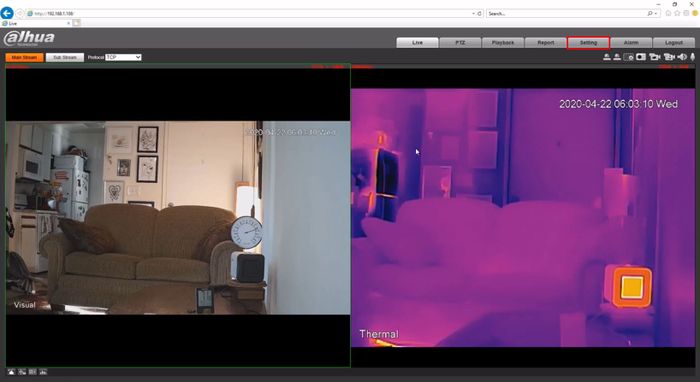
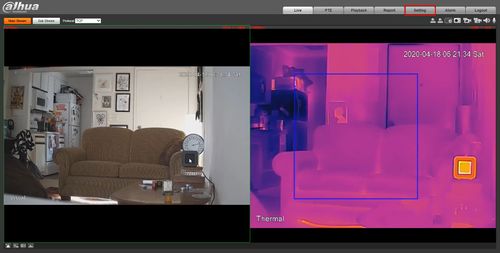
Click Setting
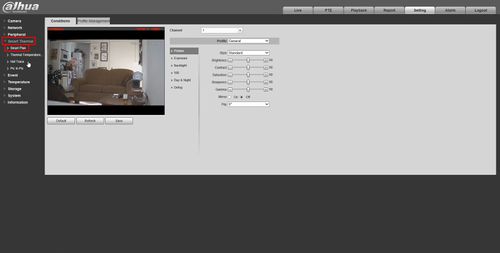
Click Smart Thermal > Smart Plan
Click the ![]() icon to enable the plan.
icon to enable the plan.
Click Save
Set rules of human temperature measurement
Set Rules Of Human Temperature Measurement
Configure the parameters for the Human Temperature Measurement
- Log into Camera
Click Setting
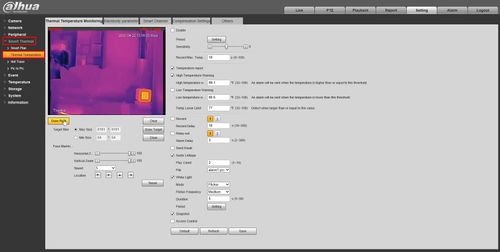
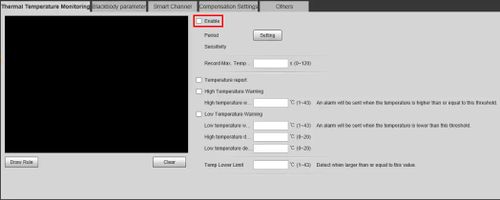
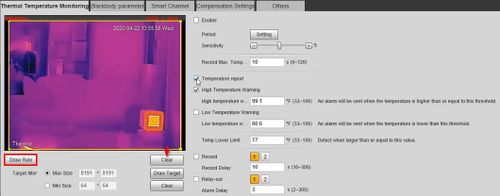
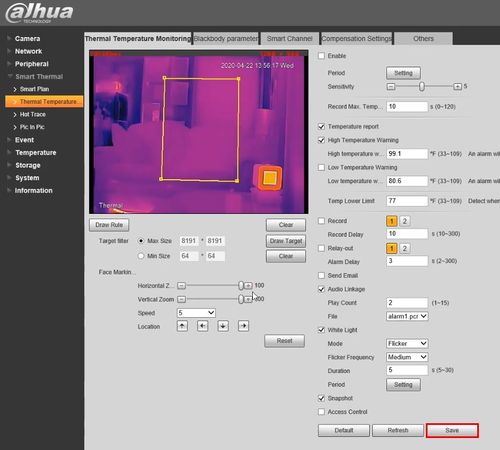
Click Smart Thermal > Thermal Temperature Monitoring
Check the box to enable human temperature measurement
Check the box to enable Temperature report - this will report/display all temperature values
Check the box to enable High Temperature Warning - an alarm will be sent when the temperature is higher than or equal to this value
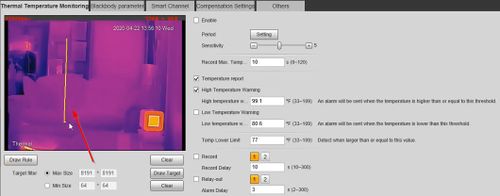
Click Draw Rule to configure the rule box
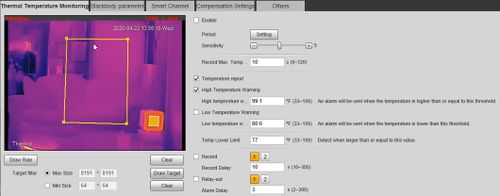
Left click inside the frame to draw the box
Completed
Click Save
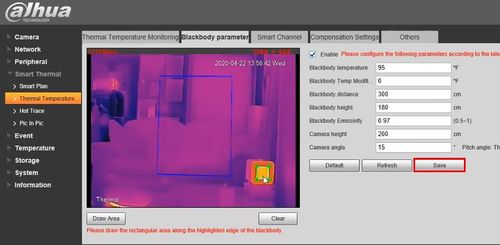
Set blackbody parameters
Set Blackbody Parameters
Configure the parameters for the Blackbody device for Human Temperature Measurement
- Log into Camera
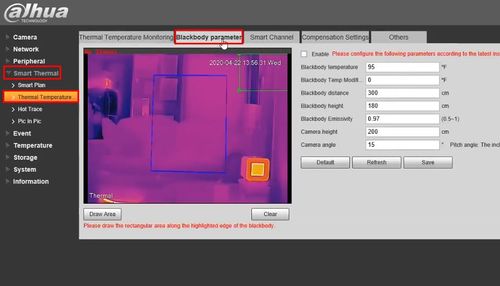
Click Setting
Click Smart Thermal > Thermal Temperature
Select the Blackbody parameter tab
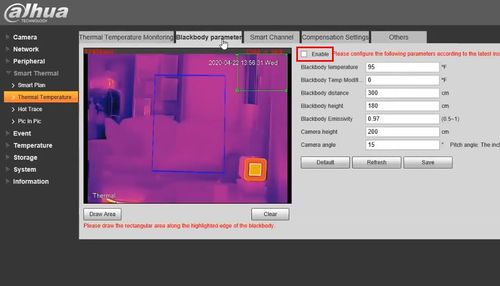
Check the box to enable
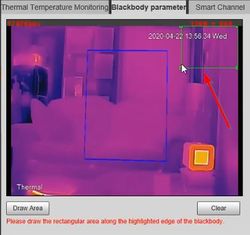
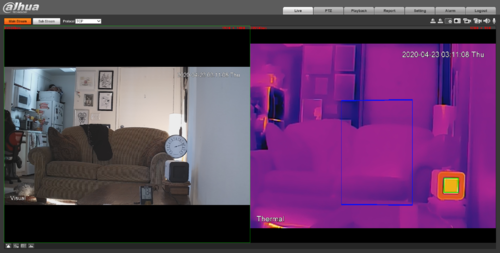
Click inside the video frame to select the green rule box
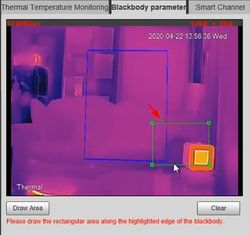
The rule needs to be drawn along the bold highlighted edge, just surrounding the highlighted area of the blackbody
Left click to drag and move the box and click the corners to resize the box
Click Save
Example of properly configured Blackbody box:
 ]
]Configure Advanced/Other Settings
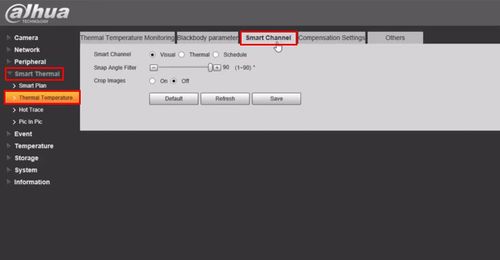
Configure Advanced/Other Settings
Configure advanced/other parameters for the camera for Human Temperature Measurement
- Log into Camera
Click Setting
Click Smart Thermal > Thermal Temperature
Click the Smart Channel tab
Select which channel is used for Intelligent analysis
For normal scenes Visual channel is used to detect faces by default
For some scenes such as dark or with backlight environment, Thermal channel can be used
Snap Angle Filter - larger the value, easier it is to capture the side face
For example , when value is 1 , only the front face can be detected
Click SaveCheck environment temperature
Check Environment Temperature
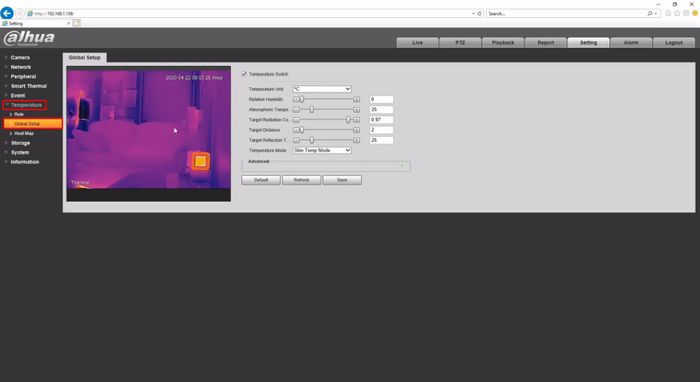
If the default temperature parameters are not accurate this situation will affect the human body temperature measurement.
If human body temperature is inaccurate, try the following steps:
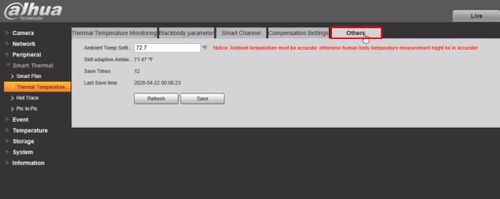
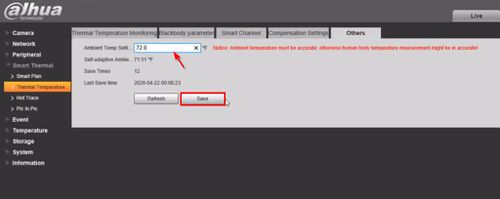
Step 1 - Ambient temperature
- Log into Camera
- Setting > Smart Thermal > Human temperature measurement > Others
- Use thermometer to detect the real ambient temperature on site and enter the number
- Click Save
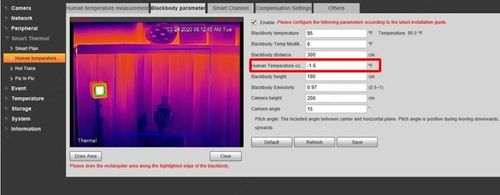
Step 2 - Human temperature correction
- Use a thermometer to detect the real Human body temperature:
Calculate the difference between real Human body temperature and measure the temperature from the thermal camera, enter this value in Human Temperature correction field.
Smart Thermal > Human Temperature Monitoring > Blackbody parameter:
For example: real Human body temperature is 98.6F (37C), measure temperature in thermal camera is 100F (37.8C)
Human Temperature correction should be 98.6 - 100 = -1.4
Click SaveEvent Verification
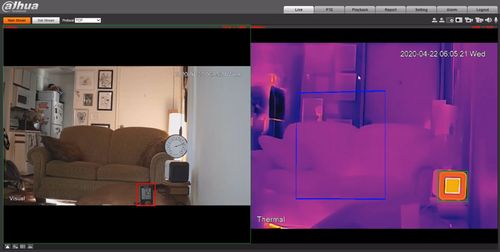
Event Verification
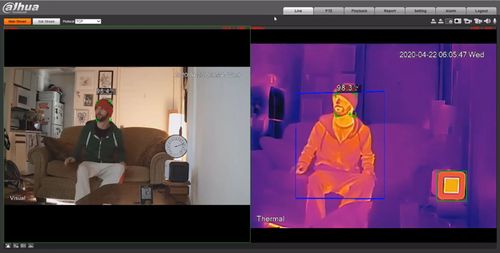
Once configuration is complete, go to Live interface to verify temperature measurement
- Log into Camera
- Check measurement value on screen
- Compare it with the value on the frontal temperature gun, thermometer ( if available)
