Difference between revisions of "Thermal/Hot Trace"
| Line 3: | Line 3: | ||
You can enable '''Hot Trace''' to track spots with the highest temperature and spots with the lowest temperature | You can enable '''Hot Trace''' to track spots with the highest temperature and spots with the lowest temperature | ||
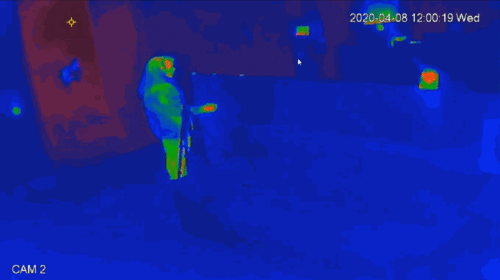
| − | Example of | + | Example of High/Low Temperature Points in Live View (WebUI): |
[[File:Hot_trace_alarm.gif|500px]] | [[File:Hot_trace_alarm.gif|500px]] | ||
Latest revision as of 22:51, 9 April 2020
Contents
Hot Trace
Description
You can enable Hot Trace to track spots with the highest temperature and spots with the lowest temperature
Example of High/Low Temperature Points in Live View (WebUI):
Prerequisites
- Dahua device with Hot Trace function - DH-TPC-BF5400N-B7 used for guide
Video Instructions
Step by Step Instructions
1. Enter the IP of the device into a browser (default 192.168.1.108)
At the Web Login
Enter the Username and Password
Click Login
2. Click Setting
3. Click Smart Thermal > Hot Trace
4. Check the box to Enable
5. Select the desired Color Mode:
- Auto: Select colors for the highest/lowest temperature automatically according to surveillance images
- Manual: Define colors for the highest/lowest temperature:
6. Click Save


