Difference between revisions of "NVR/Recording Setup/RAID Hotspare"
(Created page with "==How to setup Hotspare== ===Pre-Requisites=== *An NVR that supports RAID and Hotspare *3 or more hard drives installed on your NVR ===Step by Step Instructions to Setup Hotsp...") |
|||
| Line 2: | Line 2: | ||
===Pre-Requisites=== | ===Pre-Requisites=== | ||
*An NVR that supports RAID and Hotspare | *An NVR that supports RAID and Hotspare | ||
| − | *3 or more hard drives installed on your NVR | + | *3 or more hard drives installed on your NVR, including a drive that is not currently part of the RAID array. |
| + | *Completed the instructions to setup RAID [[RAIDSetup|Link Here]] | ||
===Step by Step Instructions to Setup Hotspare=== | ===Step by Step Instructions to Setup Hotspare=== | ||
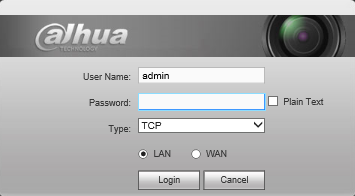
1. Login to your NVR from the web interface. | 1. Login to your NVR from the web interface. | ||
| Line 9: | Line 10: | ||
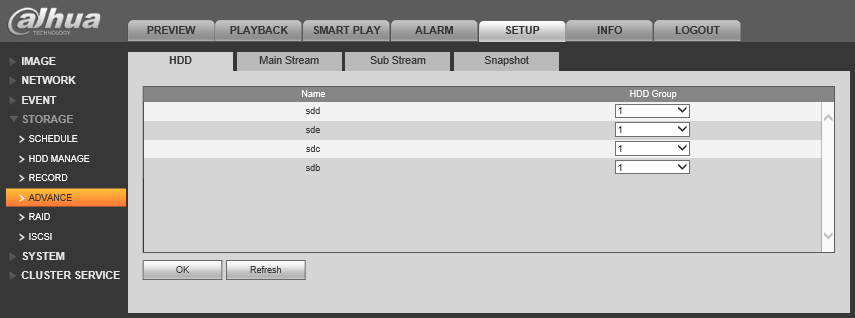
2. Go to Setup->Storage->Advance | 2. Go to Setup->Storage->Advance | ||
| + | |||
| + | [[file:Hotspare1.png]] | ||
| + | |||
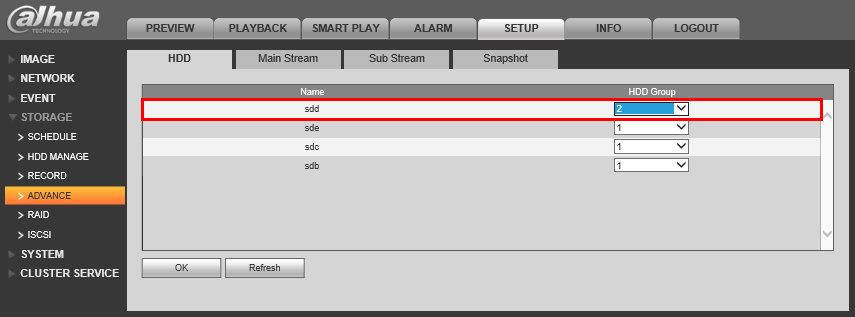
| + | 3. Select the drive you wish to assign as the Hotspare, and set that drive to "HDD Group 2" | ||
| + | |||
| + | [[file:Hotspare2.png]] | ||
| + | |||
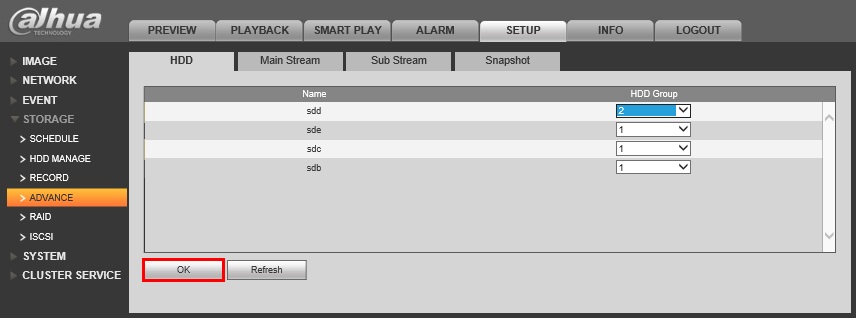
| + | 4. Click, "OK" | ||
| + | |||
| + | [[file:Hotspare3.png]] | ||
| + | |||
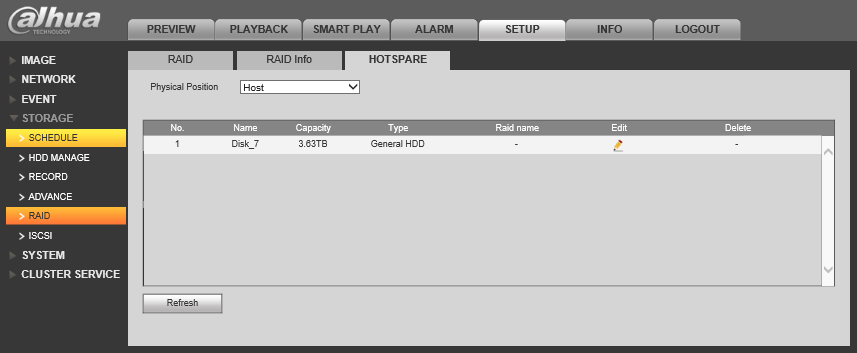
| + | 5. Go to Setup->Storage->RAID->Hotspare | ||
| + | |||
| + | [[file:Hotspare4.png]] | ||
| + | |||
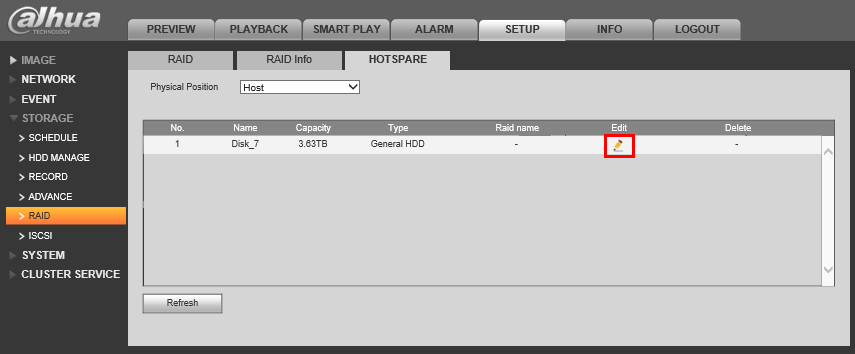
| + | 6. Click on the [[file:PencilIcon.png]](pencil) icon. | ||
| + | |||
| + | [[file:Hotspare5.png]] | ||
| + | |||
| + | 7. Choose the RAID array you wish to assign the Hotspare drive to, and click, "OK" | ||
| + | |||
| + | [[file:Hotspare6.png]] | ||
| + | |||
| + | 8. Click, "OK" again on the confirmation dialogue. | ||
| + | |||
| + | [[file:Hotspare7.png]] | ||
| + | |||
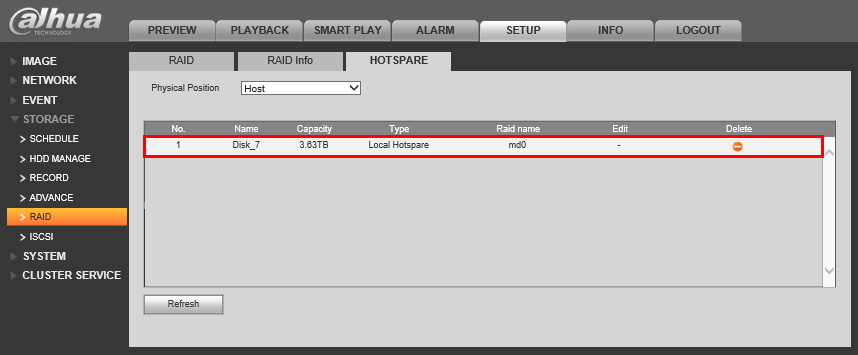
| + | 9. Once complete, the drive should be listed under, "Type" as either, "Local Hotspare" or "Remote Hotspare" | ||
| + | |||
| + | [[file:Hotspare8.png]] | ||
Revision as of 23:53, 18 December 2015
How to setup Hotspare
Pre-Requisites
- An NVR that supports RAID and Hotspare
- 3 or more hard drives installed on your NVR, including a drive that is not currently part of the RAID array.
- Completed the instructions to setup RAID Link Here
Step by Step Instructions to Setup Hotspare
1. Login to your NVR from the web interface.
2. Go to Setup->Storage->Advance
3. Select the drive you wish to assign as the Hotspare, and set that drive to "HDD Group 2"
4. Click, "OK"
5. Go to Setup->Storage->RAID->Hotspare
6. Click on the ![]() (pencil) icon.
(pencil) icon.
7. Choose the RAID array you wish to assign the Hotspare drive to, and click, "OK"
8. Click, "OK" again on the confirmation dialogue.
9. Once complete, the drive should be listed under, "Type" as either, "Local Hotspare" or "Remote Hotspare"
