Difference between revisions of "DMSS/Add Dahua Device via P2P"
(Created page with "=Add Dahua Device via P2P= ==Description== ==Prerequisites== ==Video Instructions== <embedvideo service="youtube">https://www.youtube.com/watch?v=EXAMPLE</embedvideo> ==Step b...") |
|||
| (11 intermediate revisions by 5 users not shown) | |||
| Line 1: | Line 1: | ||
=Add Dahua Device via P2P= | =Add Dahua Device via P2P= | ||
| + | |||
==Description== | ==Description== | ||
| + | This article will cover how to add a Dahua device to DMSS via P2P | ||
| + | |||
==Prerequisites== | ==Prerequisites== | ||
| − | + | * Dahua device already initialized | |
| − | + | * [[DMSS|DMSS]] Installed | |
| + | |||
==Step by Step Instructions== | ==Step by Step Instructions== | ||
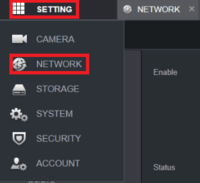
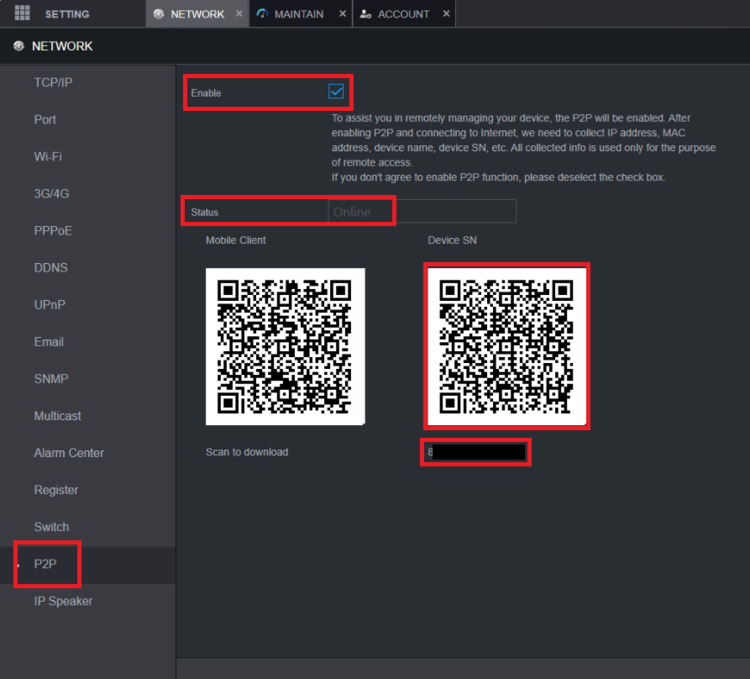
| − | 1. | + | 1. On the local monitor or web interface of the Dahua Device you wish to add, navigate to Settings > Network > P2P. Make sure P2P is enabled and online: |
| − | [[File: | + | |
| + | [[File:DMSSAddP2P1.png|200px]] | ||
| + | |||
| + | [[File:DMSSAddP2P2.png|750px]] | ||
| + | |||
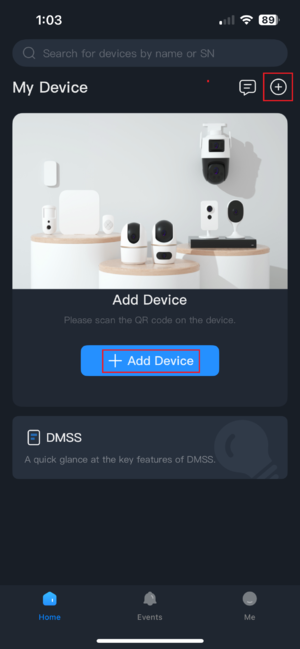
| + | 2. In the DMSS mobile app, navigate to the Home tab (bottom left) and tap the + in the top right corner, or the Add Device button if available: | ||
| + | |||
| + | [[File:DMSSAddP2P3.png|300px]] | ||
| + | |||
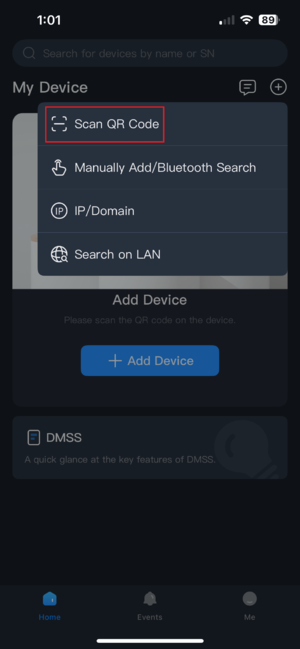
| + | 3. Select the Scan QR Code option: | ||
| + | |||
| + | [[File:DMSSAddP2P4.png|300px]] | ||
| + | |||
| + | 4. If prompted, be sure to allow DMSS to access your devices camera: | ||
| + | |||
| + | [[File:DMSSAddP2P5.png|300px]] | ||
| + | |||
| + | 5. Locate the serial number QR code (as pictured in step 1) and place it in the frame of the scanner. Alternatively, you can select the option to Manually Enter SN if you wish to type the serial number in manually: | ||
| + | |||
| + | [[File:DMSSAddP2P6.png|300px]] | ||
| + | |||
| + | 6. After the scan completes it will auto-fill the serial number for you (or you will type it in here if you chose to manually enter). Do not enter a security code. Press Next: | ||
| + | |||
| + | [[File:DMSSAddP2P7.png|300px]] | ||
| + | |||
| + | 7. Enter your devices admin password and press Next. Note: This is not your DMSS account password, it is the '''admin''' password for the device you are adding. For Android users, you may be prompted to select your device type before entering the Name and password for '''admin'''. | ||
| + | |||
| + | [[File:DMSSAddP2P8.png|300px]] | ||
| + | |||
| + | 8. The app will take a moment to authenticate the request: | ||
| + | |||
| + | [[File:DMSSAddP2P9.png|300px]] | ||
| + | |||
| + | 9. After verifying, you will be asked to name the device so you can identify it in your device list, as well as set your time zone and DST settings. Once completed, press Get Started. | ||
| + | |||
| + | [[File:DMSSAddP2P10.png|300px]] | ||
| + | |||
| + | 10. Once completed, you will be redirected to the Home tab and your newly added device will be displayed. | ||
| + | |||
| + | [[File:DMSSAddP2P11.png|300px]] | ||
Latest revision as of 16:21, 6 August 2025
Add Dahua Device via P2P
Description
This article will cover how to add a Dahua device to DMSS via P2P
Prerequisites
- Dahua device already initialized
- DMSS Installed
Step by Step Instructions
1. On the local monitor or web interface of the Dahua Device you wish to add, navigate to Settings > Network > P2P. Make sure P2P is enabled and online:
2. In the DMSS mobile app, navigate to the Home tab (bottom left) and tap the + in the top right corner, or the Add Device button if available:
3. Select the Scan QR Code option:
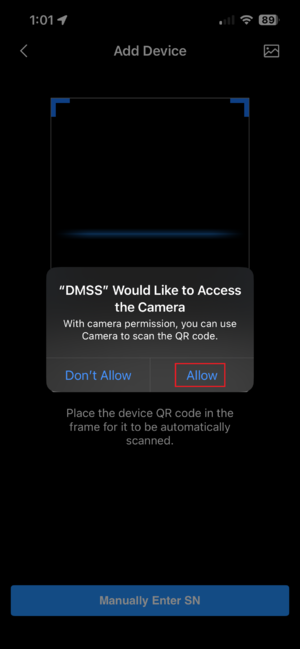
4. If prompted, be sure to allow DMSS to access your devices camera:
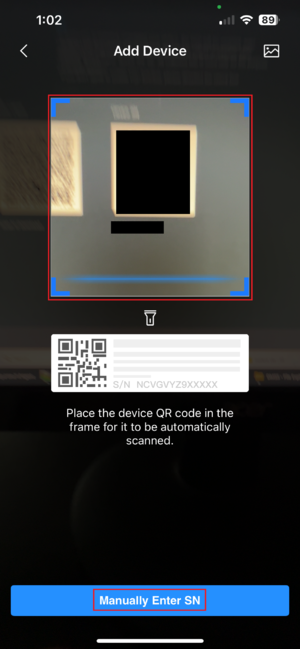
5. Locate the serial number QR code (as pictured in step 1) and place it in the frame of the scanner. Alternatively, you can select the option to Manually Enter SN if you wish to type the serial number in manually:
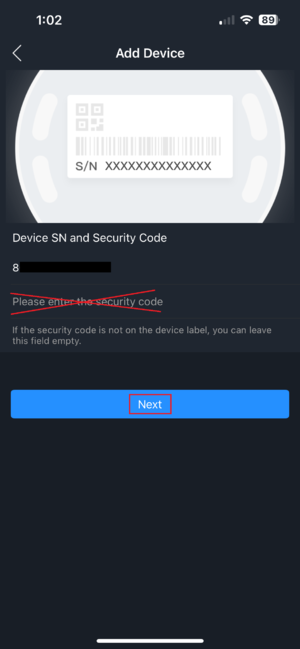
6. After the scan completes it will auto-fill the serial number for you (or you will type it in here if you chose to manually enter). Do not enter a security code. Press Next:
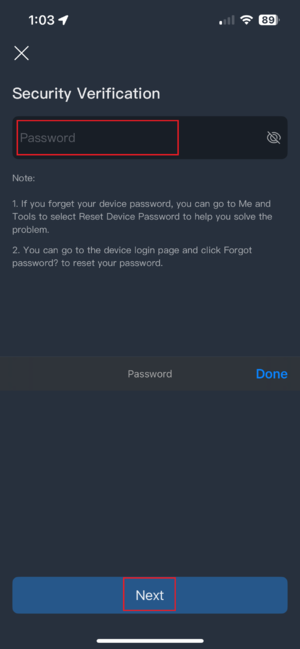
7. Enter your devices admin password and press Next. Note: This is not your DMSS account password, it is the admin password for the device you are adding. For Android users, you may be prompted to select your device type before entering the Name and password for admin.
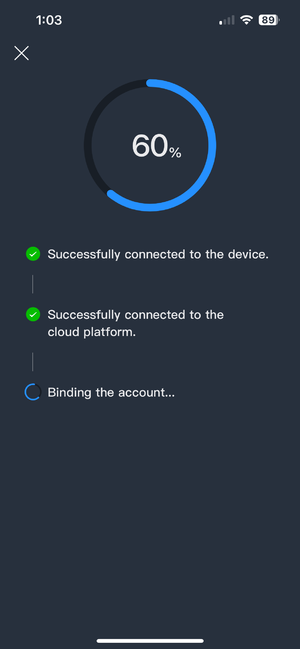
8. The app will take a moment to authenticate the request:
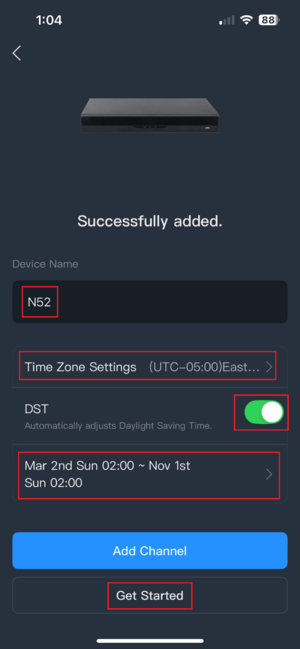
9. After verifying, you will be asked to name the device so you can identify it in your device list, as well as set your time zone and DST settings. Once completed, press Get Started.
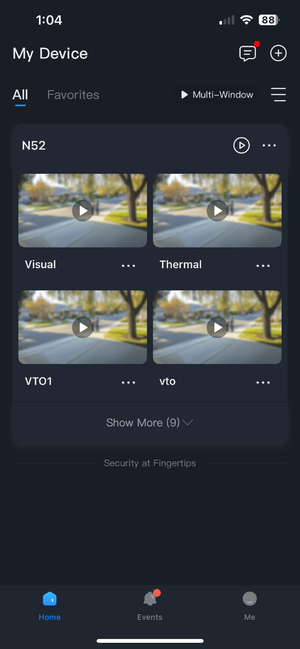
10. Once completed, you will be redirected to the Home tab and your newly added device will be displayed.
